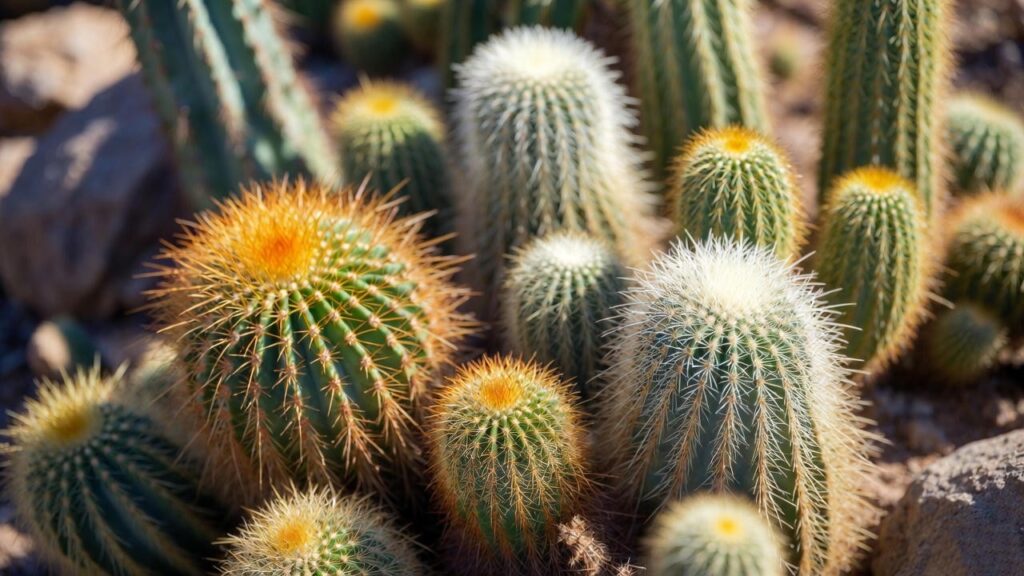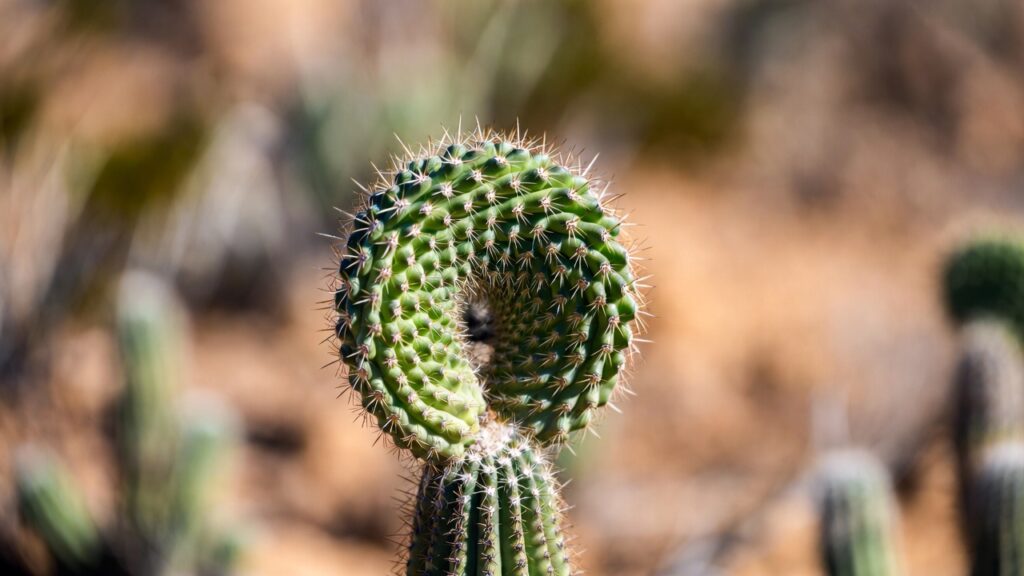
There is a distinct heartbreak unique to the indoor gardener: picking up a beautifully structured, golden-spined desert specimen only to feel the horrifying, mushy yield of tissue collapsing beneath your fingers. The lady finger cactus (Mammillaria elongata) is widely celebrated as one of the most visually striking and structurally elegant additions to any indoor plant collection. With its tightly clustered, cylindrical stems adorned with a golden lace of radial spines, it is frequently marketed to beginners as an unkillable, “set-it-and-forget-it” houseplant.
Yet, this deceptive reputation often lures indoor gardeners into a false sense of security. While exceptionally resilient against underwatering and dry indoor air, this stunning Mexican native harbors a fatal vulnerability. Beneath the soil line sits a delicate root architecture that can be destroyed by an invisible, subterranean enemy long before any distress signals manifest on the surface. That enemy is fungal root rot, a silent killer almost always triggered by minor, easily correctable structural mistakes in daily care.
If you have noticed your golden clusters looking a bit lackluster, or if you simply want to ensure your investment thrives for decades and rewards you with its signature pale-yellow spring blooms, this comprehensive guide is your definitive blueprint. We will dissect the exact biological mechanisms behind root rot, isolate the five critical mistakes that invite fungal pathogens into your soil, and provide actionable, expert-tested strategies to ensure your cactus remains a vibrant centerpiece of your home.
1. Behind the Golden Lace: A Botanical Profile
To successfully care for the lady finger cactus indoors, we must first understand the environmental forces that shaped its evolution. Mammillaria elongata is native to the high-altitude limestone hills of Central Mexico, specifically regions like Hidalgo, Querétaro, and Guanajuato. In these microclimates, the plants grow in rock crevices, steep banks, and well-draining mineral fields where water never accumulates.
-
Scientific Classification: Mammillaria elongata belongs to one of the largest genera in the cactus family (Cactaceae), famous for producing distinct, nipple-like tubercles across the plant body rather than continuous ribs.
-
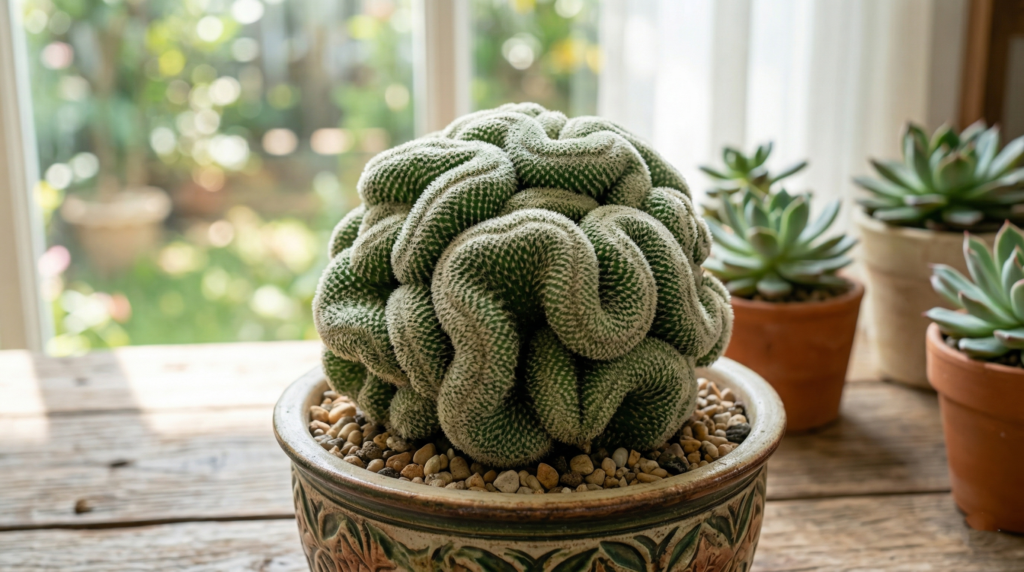
Growth Habit: It features an erect or prostrate clumping habit. Individual stems, or “fingers,” typically reach six to eight inches in height and up to two inches in diameter, gradually forming massive, densely packed mounds over several years.
-
The Spine Architecture: The mesmerizing golden color of the plant is created by fifteen to twenty-five slightly recurved, radiating spines per areole, forming an intricate, interlaced mesh. This mesh serves a critical survival function: it deflects harsh sunlight, reduces moisture loss from the stem surface, and creates a micro-insulative layer of air around the plant body.
-
Toxicity and Safety: Culturally, it is comforting to know that Mammillaria elongata is chemically non-toxic to domestic pets like cats and dogs. However, because the spines are sharp and hooked, the plant should still be kept out of reach to avoid physical injury to curious paws and noses.
When brought indoors, this plant attempts to execute its desert survival programming inside an environment that is fundamentally alien to it. Indoor spaces feature stagnant air, lower light intensities, higher relative humidity, and synthetic potting soils that hold moisture for weeks. Bridging this environmental gap requires breaking down the cultural practices that lead to cultivation failure.
2. Mistake #1: The “Calendar Watering” Trap
The single most common catalyst for root rot is watering on a fixed, calendar-based schedule. Adhering to a rigid rule—such as watering every Tuesday or every alternating Friday—fundamentally ignores the dynamic, shifting variables of an indoor environment. Evaporation and transpiration rates alter dramatically based on seasonal light fluctuations, household ambient humidity, temperature shifts, and the structural material of the pot.
The Biology of Desert Roots vs. Fungal Pathogens
To understand why calendar watering is so destructive, we must look at the cellular structure of Mammillaria elongata roots. Desert cacti have evolved shallow, wide-reaching, fibrous root systems designed to rapidly absorb moisture from brief flash rains before the desert sun bakes the earth dry again. When soil remains continuously damp, the spaces between soil particles remain filled with water instead of oxygen.
Cactus roots require oxygen for cellular respiration. When starved of oxygen due to persistent waterlogging, the root cells suffocate, die, and begin to decay. This dead organic matter becomes the perfect host for opportunistic, water-loving fungal pathogens, primarily Phytophthora, Pythium, and Fusarium. Once these fungi gain a foothold in the decaying root tips, they migrate upward into the vascular system of the cactus, systematically destroying its ability to transport nutrients and water.
Shifting to the “Soak-and-Dry” Protocol
To eliminate this risk completely, you must replace your calendar with a tactile inspection method known as the “soak-and-dry” technique. This method mandates that the potting substrate must be entirely dry throughout the entire depth of the container before another drop of water is applied.
-
Deep Moisture Testing: The top inch of soil feeling dry is not an indicator that it is time to water. Use a raw wooden chopstick or a wooden skewer inserted deeply into the bottom of the pot. Leave it for ten seconds. If it comes out with dark soil clinging to it or feels cool and damp to the touch, moisture remains in the root zone. Do not water.
-
The Weight Test: Get into the habit of lifting your potted lady finger cactus immediately after a thorough watering, and then again when you know the soil is completely bone-dry. The difference in weight is substantial. Over time, you can accurately judge the moisture content of the pot simply by picking it up.
-
The Golden Rule of Application: When it is truly dry, water the substrate thoroughly until excess water streams freely out of the drainage holes at the bottom of the vessel. This flushes out accumulated salts and ensures all roots receive moisture. Never give small, frequent sips of water; this keeps the top soil damp while leaving lower roots to wither, while simultaneously encouraging salt crusts to build up around the crown.
Seasonal Adaptation: Active Growth vs. Winter Dormancy
Your watering frequency must drop significantly as seasons change. During the active spring and summer growth periods, higher temperatures and intense sunlight mean the cactus processes water much faster. You might find the soil dries out completely every 10 to 14 days.
In late autumn and winter, however, the lady finger cactus enters a period of profound dormancy triggered by shorter days and cooler temperatures. Its metabolic processes slow to a near-halt. During this phase, the plant requires almost no water. Depending on your home’s ambient temperature, a dormant Mammillaria elongata may only need to be watered once every 4 to 6 weeks—or skipped entirely from November through February if kept in a cool room.
3. Mistake #2: Using Standard “Off-the-Shelf” Potting Soil
Many well-meaning indoor gardeners walk into a garden center, purchase a generic bag labeled “Cactus and Succulent Mix,” and assume it is perfectly formulated for their lady finger cactus. Unfortunately, the vast majority of commercial potting soils—even those marketed for succulents—utilize a base heavy in peat moss, composted forest products, or coconut coir.
While these organic ingredients are excellent for tropical houseplants that crave uniform moisture, they are highly problematic for desert cacti. Peat moss is highly hydrophilic when damp, holding onto water molecules like a sponge for days or even weeks. Furthermore, once peat moss dries out completely, it becomes hydrophobic, forming a hardened, brick-like clod that shrinks away from the sides of the pot. When you attempt to water it, the liquid simply runs down the interior walls of the container, leaving the central root ball completely dry while the outer crust stays soggy.
Mimicking Limestone Habitats: The Importance of Inorganic Grit
In its native Mexican habitat, the lady finger cactus grows in soils dominated by weathered limestone, volcanic debris, coarse sand, and gravel. The organic content of this soil is exceptionally low, often constituting less than 10% of the total volume. The primary function of this substrate is structural stability and rapid water transit, not water retention.
To protect your Mammillaria elongata from root rot, you must cultivate it in a highly porous, gritty substrate that dries completely within three to four days of a heavy watering.
The Ultimate Ultimate DIY Substrate Recipe
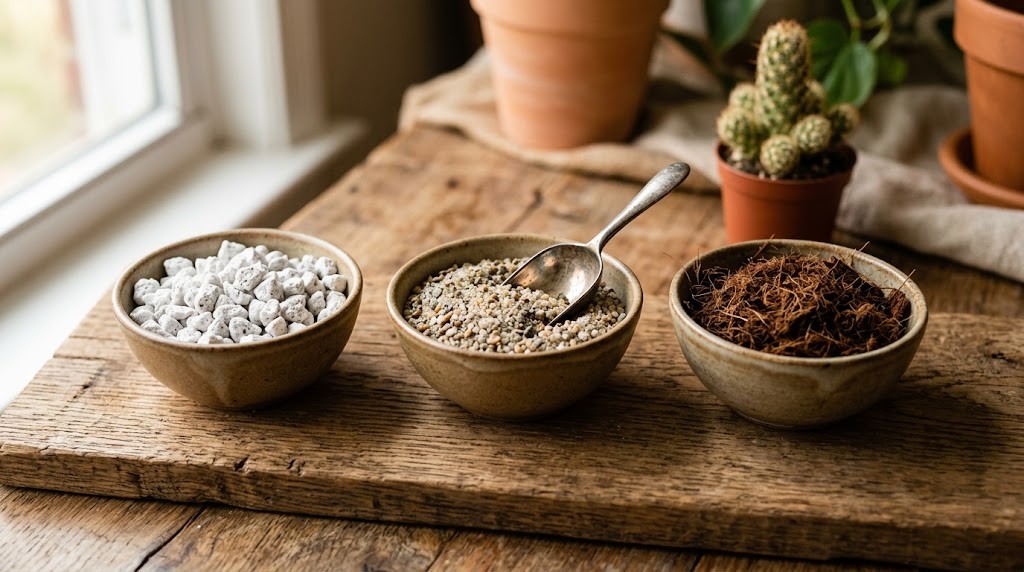
Instead of relying on commercial mixes straight out of the bag, you can easily blend a premium, professional-grade cactus substrate at home. This recipe prioritizes structural integrity, outstanding aeration, and swift drainage:
-
40% Pumice or Coarse Perlite: Pumice is the gold standard for cactus cultivation. It is a porous, volcanic rock that creates vast pockets of oxygen within the soil while absorbing only a fractional, safe amount of moisture. If pumice is unavailable, coarse-grade perlite serves as an excellent, lightweight alternative to ensure aeration.
-
30% Coarse Horticultural Sand or Fine Gravel: Avoid fine play sand or beach sand, as the tiny uniform grains pack together tightly when wet, creating a concrete-like barrier that suffocates roots. Instead, use sharp horticultural sand, poultry grit (crushed granite), or fine river gravel to add weight and create non-uniform channels for water to race through.
-
30% Screened Organic Matter: Use a high-quality organic potting soil or coconut coir as your base, but pass it through a quarter-inch mesh screen first to remove large wood chunks, debris, and dense peat clods. This provides the minimal organic matter and trace nutrients your cactus needs without compromising drainage.
By shifting the balance of your substrate heavily toward inorganic grit, you create a safety net. Even if you accidentally water a few days too early, the hyper-porous structure allows excess moisture to escape so quickly that fungal spores never receive the sustained damp environment they require to germinate.
4. Mistake #3: Picking Aesthetics Over Drainage
It is easy to fall in love with a beautiful, hand-glazed ceramic planter or an ultra-modern geometric pot that perfectly matches your home decor. However, housing a lady finger cactus in a container chosen solely for its aesthetic appeal is a recipe for structural failure. The physical composition, shape, and mechanical design of the pot play a massive role in how fast moisture evaporates from the root zone.
The Terracotta vs. Plastic and Glazed Ceramic Debate
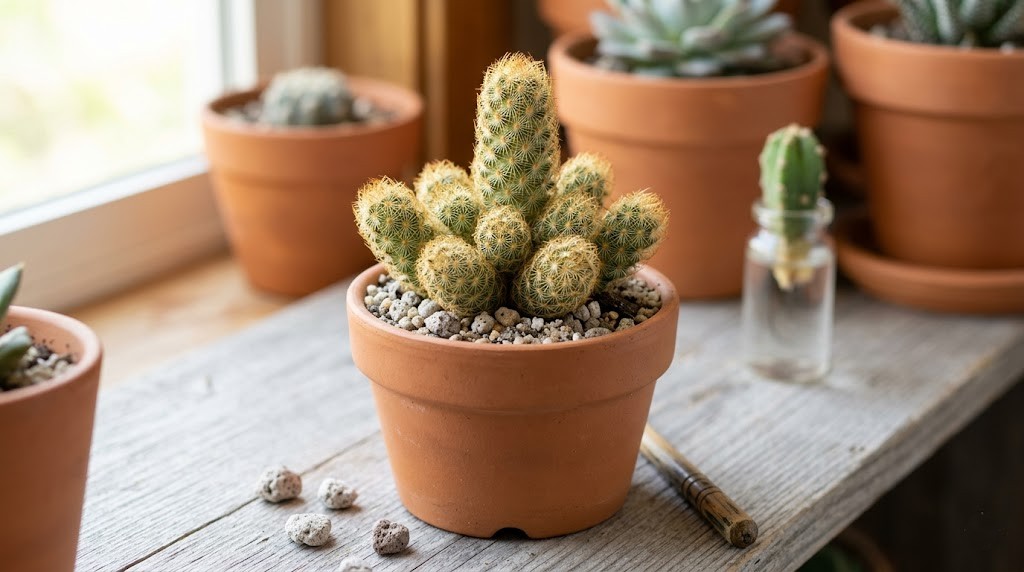
When it comes to cultivating Mammillaria elongata successfully indoors, unglazed terracotta is the undisputed champion. Terracotta is fired clay, a naturally porous, breathable material. When you water a cactus in a terracotta pot, the clay absorbs moisture through its walls and allows it to evaporate out into the surrounding room air. This creates a multi-directional drying process: the soil dries from the top down, the bottom up, and from the outside in.
Conversely, containers made from plastic, metal, resin, or glazed ceramic are entirely non-porous. They lock moisture deep within their walls. In these containers, water can only escape through the top surface of the soil or the bottom drainage hole. This dramatically extends the drying time, keeping the lower roots submerged in a stagnant microclimate for an unsafe duration.
The “No Drainage Hole” Fallacy
It cannot be overstated: a container without a functional drainage hole is a death sentence for a lady finger cactus. Many amateur growers attempt to circumvent this by placing a one- or two-inch layer of rocks, gravel, or charcoal at the bottom of a hole-less pot, believing this creates a safe “drainage reservoir.”
This is a dangerous misconception debunked by the physics of soil hydrology, specifically a phenomenon known as a perched water table. Water does not move easily from a fine-textured material (like potting soil) into a coarse-textured material (like gravel) until the upper layer becomes completely saturated to the point of pooling.
Therefore, that layer of rocks at the bottom actually pushes the water table higher up into the pot, closer to the delicate root system of your cactus. The water sits stagnant at the bottom of the container, turning into a foul anaerobic bog that breeds root rot within a matter of weeks. Every pot housing your Mammillaria elongata must feature at least one clear, unobstructed drainage hole. If you absolutely must use a decorative, hole-less outer pot (a cachepot), keep the cactus planted in a utility terracotta pot that you remove completely every single time you water, returning it only when it has stopped dripping entirely.
Sizing Mistakes and Volumetric Ratios
Pot size matters just as much as pot material. When repotting a clumping lady finger cactus, always select a container that is only roughly one inch larger in diameter than the existing root ball. Placing a small cactus into an oversized container creates an abundance of “empty soil” where no roots reach to absorb moisture. When you water, that massive volume of unoccupied soil holds onto water for an extended period, creating a permanent zone of wetness that eventually rots out the neighboring roots.
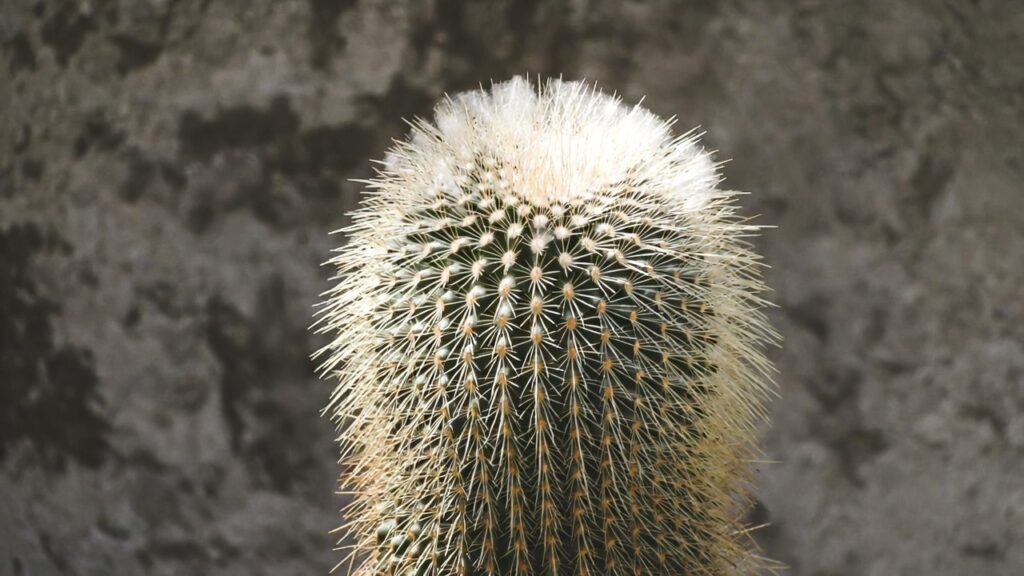
5. Mistake #4: The Window Illusion (Hidden Light Starvation)
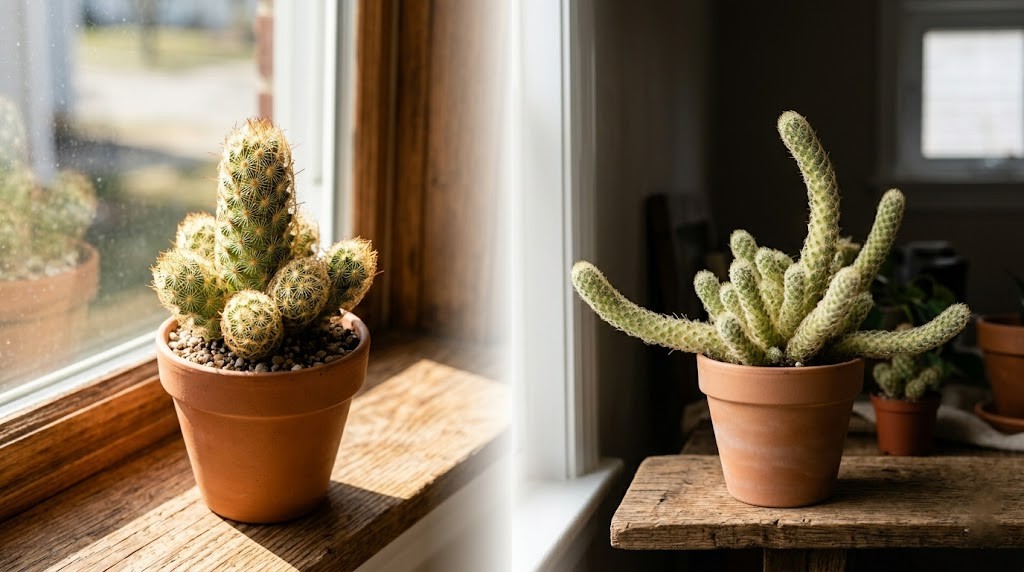
To human eyes, a bright living room feels incredibly well-lit. To a desert cactus, however, the interior of a standard home can feel like a dark cave. Cacti are photophilic organisms optimized to utilize high intensities of solar radiation. When we place a lady finger cactus on a coffee table or a shelf several feet away from a window, we subject it to severe light starvation, even if the room looks bright to us.
The Etiolation-Rot Connection
When a lady finger cactus receives insufficient light, it initiates an emergency survival mechanism called etiolation. The plant stops putting energy into root development or spine production and instead focuses all its reserves on rapid, vertical stretching toward the nearest light source.
You will notice the normally plump, golden, tightly clustered fingers becoming pale green, thin, tapered at the tips, and structurally weak. The spines grow farther apart, exposing the delicate epidermal tissue of the stem.
What many growers fail to realize is that etiolation is directly linked to root rot. A light-starved cactus experiences a dramatic slowdown in its metabolic rate. It photosynthesizes inefficiently, meaning it requires significantly less water to maintain its basic functions. Consequently, when you water an etiolated cactus, the soil stays wet for vastly longer periods because the plant lacks the solar energy required to draw that water up through its root system and transpire it into the air. Furthermore, the compromised immune system of a weak, light-starved plant makes it incapable of fighting off low-level fungal attacks that a healthy cactus would easily repel.
Measuring and Optimizing Indoor Light
Your Mammillaria elongata requires a minimum of six hours of direct, unfiltered sunlight daily, supplemented by bright, indirect light for the remainder of the day.
-
Optimal Placement: In the Northern Hemisphere, a completely unobstructed South- or West-facing window sill is the absolute best location for your cactus. East-facing windows provide excellent morning sun but may require supplemental help, while North-facing windows are entirely inadequate for long-term health.
-
The Glass Barrier: Keep in mind that modern energy-efficient window glass is frequently treated with UV-blocking films. This filters out a significant portion of the light spectrum that cacti utilize for photosynthesis.
-
Integrating Supplemental Grow Lights: If you lack bright windows, you can easily maintain a pristine, compact lady finger cactus by utilizing a dedicated LED grow light. Look for a full-spectrum LED fixture with a high color rendering index (CRI) and position it roughly 6 to 12 inches directly above the top of the cactus cluster. Run the light on a consistent timer for 12 to 14 hours a day to simulate a pristine desert sky.
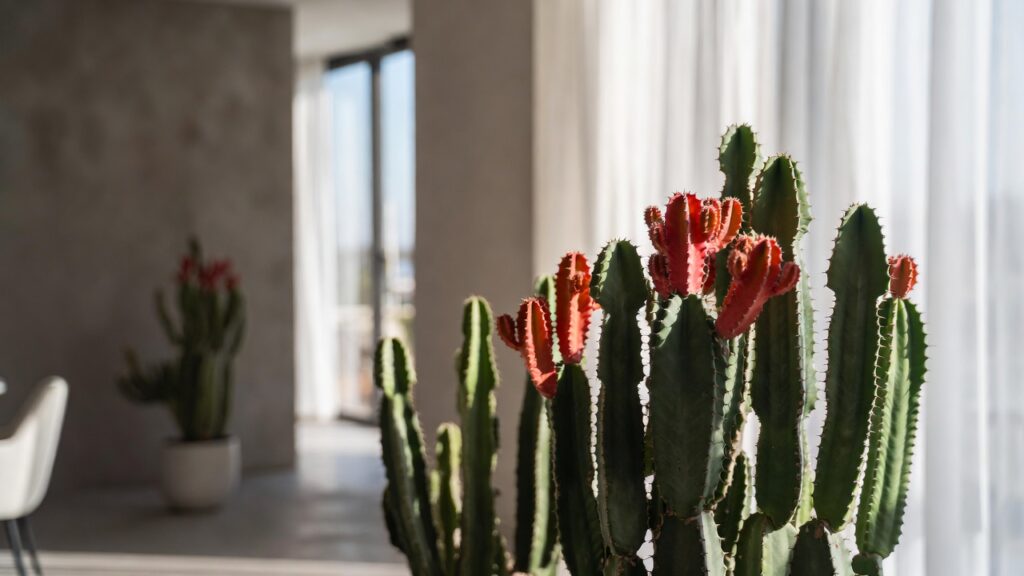
6. Mistake #5: High Indoor Humidity and Poor Air Circulation
The final piece of the environmental puzzle is the ambient atmosphere surrounding your plant. Because we treat houseplants as static decor items, we often forget that in nature, plants are subjected to constant, dynamic air movement. The high-altitude limestone hills where the lady finger cactus originates are swept by continuous breezes that immediately carry away ambient humidity and dry out surface moisture.
The Microclimate Blunder
When we group houseplants together to form an attractive indoor jungle, we create a distinct microclimate. Tropical plants like Monsteras, Pothos, and Calatheas constantly release moisture into the air through microscopic pores in their leaves via a process called transpiration. If you nestle your desert-loving Mammillaria elongata right in the middle of this dense tropical cluster, you surround it with a bubble of stagnant, high-humidity air.
High relative humidity slows the rate of evaporation from the soil surface and causes moisture to linger around the base or “crown” of the cactus. If moisture settles in the tight crevice where the cylindrical stems meet the soil line, it can trigger crown rot—a variation of root rot that attacks the plant from the top down, causing the main stalks to collapse outward.
Practical Steps to Improve Ventilation
To protect your plant from atmospheric moisture traps:
-
Isolate Your Desert Collection: Keep your cacti, agaves, and desert succulents physically separated from your tropical, humidity-loving foliage plants. Create a dedicated “desert zone” on your brightest window sill.
-
Introduce Active Ventilation: If you cultivate your plants in an enclosed room, office, or small apartment, introduce a small, low-wattage personal fan. Set it to oscillate on its lowest speed. You do not want a gale-force wind blowing directly on the plant, but rather a gentle, continuous air movement that breaks up stagnant pockets of humidity and encourages rapid, even drying of the soil after watering.
7. Diagnostic Blueprint: Is It Thirsty, or Is It Rotting?
When a lady finger cactus begins to look sickly, amateur growers often panic and apply water, assuming the plant is dehydrated. If the plant is actually suffering from the early stages of root rot, this hit of water is the final nail in the coffin. Knowing how to accurately read the physiological cues of your cactus is critical to choosing the correct course of action.
The Under-watered Checklist (Dehydration)
When a lady finger cactus runs out of moisture reserves in its stems, it exhibits specific, predictable signs of dehydration:
-
Tactile Feedback: The individual stems will feel slightly soft or flexible, but they retain a rubbery, resilient texture rather than feeling slimy.
-
Visual Cues: The stems will visually shrink, contract, or wrinkle along the tubercles. The entire cluster may appear to pucker slightly inward as it utilizes its stored internal water reserves.
-
The Soil State: The potting substrate will be completely bone-dry throughout the container, often shrinking so much that it pulls away from the interior walls of the pot, leaving a visible gap.
-
Root Integrity: If you slip the plant out of its pot, the roots will appear dry, fibrous, and tan or light orange in color. They may be brittle, but they lack any foul odor.
The Over-watered and Rotting Checklist
When fungal pathogens have successfully breached the root system and entered the base of the plant, the symptoms are distinctly different and indicate a structural emergency:
-
Tactile Feedback: The base of the stems, right at or just below the soil line, will feel distinctly mushy, squishy, or watery. If you apply gentle pressure, the tissue may cave in completely, leaking a dark fluid.
-
Visual Cues: The lower portions of the golden fingers will lose their vibrant color, turning a sickly translucent yellow, dull gray, or dark brown/black. The golden lace pattern of the spines will appear dull and may slough off easily when touched.
-
The Aroma: A rotting cactus emits a highly distinct, foul, swampy, or sour odor of decaying vegetable matter. This is caused by anaerobic bacteria and fungi consuming the collapsing plant tissues.
-
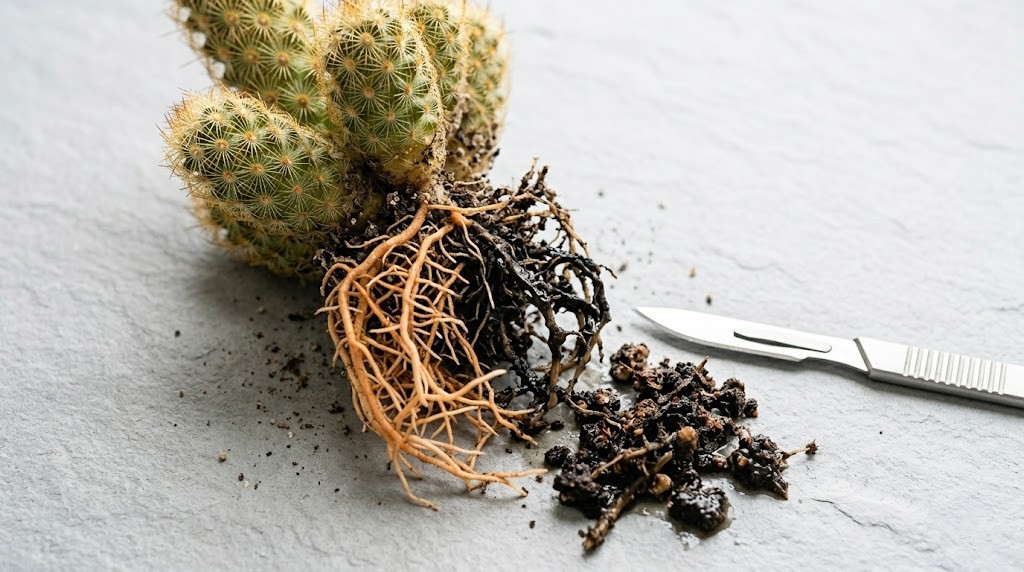
Root Integrity: Upon unpotting, you will find that the roots are no longer firm or fibrous. Instead, they are slimy, black, or dark brown, detaching from the base of the plant with the slightest tug.
8. Emergency Triage: How to Save a Lady Finger Cactus from Active Rot
If your diagnosis confirms that root rot has set in, you must act decisively. Once rot reaches the core vascular cylinder of Mammillaria elongata, it can travel up the stems with astonishing speed. However, because of the unique segmented, clumping growth habit of the lady finger cactus, saving the plant—or at least a significant portion of its genetic clone—is highly achievable through surgical propagation and rehabilitation.
Step 1: Unpot and Conduct a Root Inquest
Take the plant to a well-lit workspace. Gently tip the container sideways and slide the cactus out. Do not pull on the stems, as rotten stems will tear away from the base easily. Carefully shake away all wet soil from the root system. You can rinse the remaining root ball under a gentle stream of lukewarm tap water to clearly expose the boundaries between healthy and diseased tissue.
Step 2: The Amputation Phase
Inspect the base of the cluster. If the rot is confined to only a few stems within the mound, you can surgically isolate the healthy sections.
-
Sterilize Your Instruments: Take a sharp hobby knife, scalpel, or bypass pruners and wipe the blades down thoroughly with 70% isopropyl alcohol or a 10% bleach solution. This prevents you from accidentally spreading fungal spores to uninfected tissue during the operation.
-
Make Clean Cuts: Slice away any stems that show any sign of yellowing, mushiness, or brown discoloration at their base. When cutting a stem to save the top portion as a cutting, look closely at the interior cross-section of the stem. The central vascular ring must be pristine white or light green. If you see any brown or black dots or rings in the center, the fungus is present. Slice further up the stem until you hit entirely clean, healthy tissue.
-
Re-sterilize Between Every Single Cut: Treat your blade as a surgical instrument. Wipe it down with alcohol after every single incision to guarantee you are not re-introducing pathogens into a clean cut.
Step 3: The Callus Phase
Never pot up a fresh, wet cactus cutting immediately. Cacti lack the protective bark of woody plants; a fresh cut is an open, vulnerable wound that will instantly rot if placed back into contact with damp soil or organic matter.
Place your clean, healthy cuttings on a sheet of dry paper towel in a warm, dry room out of direct sunlight. Allow them to sit undisturbed for 48 to 72 hours—or up to a full week for larger stems. During this time, the plant will form a dry, hard, thickened skin over the wound known as a callus. This callus acts as an impermeable barrier that protects the inner tissues from soil-borne fungi.
Step 4: Repotting and Drought Rehabilitation
Once the callus is completely firm and dry to the touch, it is time to encourage new root development.
-
Prepare a Sterile, Gritty Mix: Fill a small, clean terracotta pot with a mix composed entirely of inorganic grit—70% pumice or perlite mixed with 30% coarse sand. Avoid adding organic potting soil at this stage, as we want a completely sterile environment for root initiation.
-
Position the Cuttings: Simply press the callused end of the lady finger cuttings gently into the top layer of the grit mix just deep enough so they stand upright on their own. You can use a few clean decorative pebbles to prop them up if necessary.
-
Withhold All Water: Do not water the pot. A cactus without roots cannot absorb moisture; watering the substrate at this stage will only trigger another round of rot. Keep the pot in a warm location with bright, indirect light.
-
The Waiting Game: After two to three weeks, give the cuttings a very gentle upward tug. If you feel a slight resistance, it means the plant has successfully sent out fresh, pinkish-white opportunistic root tips into the grit. At this point, you can begin applying light water using the soak-and-dry protocol, gradually introducing the plant back into direct sunlight.
9. Beyond Survival: How to Make Your Lady Finger Cactus Bloom
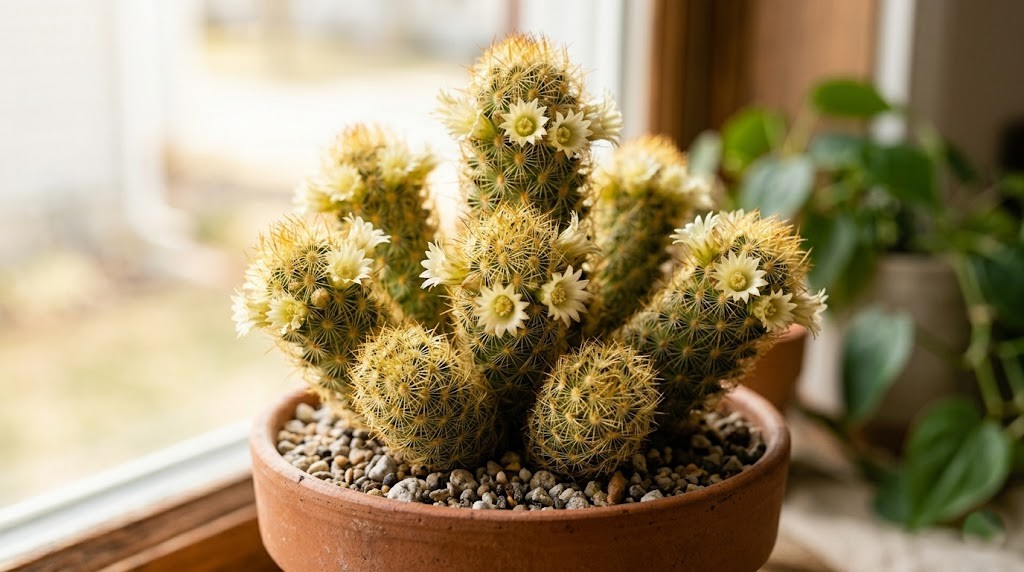
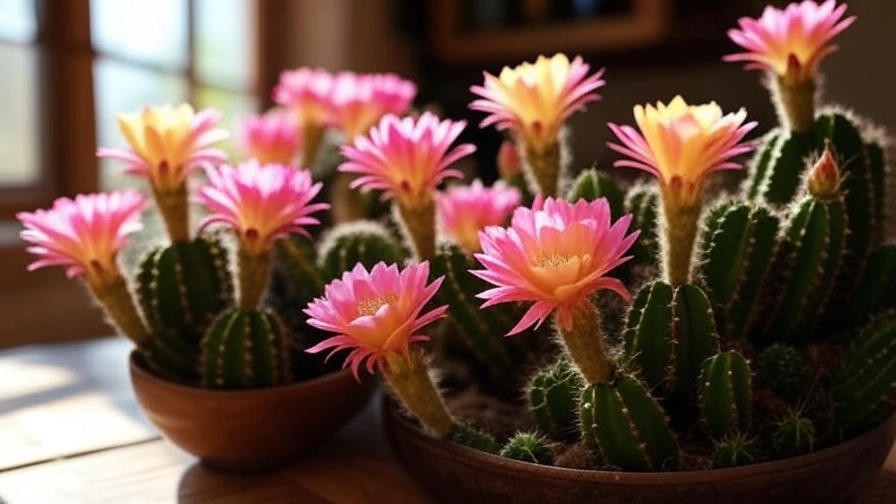
Once you have mastered the foundational mechanics of keeping your Mammillaria elongata free from root rot, you can shift your focus from mere survival to optimal performance. In the wild, older clusters of lady finger cacti put on a spectacular floral display every spring, producing rings of small, bell-shaped flowers that range from cream-colored and pale yellow to soft pink.
Achieving these blooms indoors is not a matter of luck; it requires mimicking the specific seasonal stress cycles that trigger the plant’s reproductive programming.
The Winter Chill Trick
The primary trigger for flower bud initiation in Mammillaria elongata is a distinct, cool winter rest period. In their native high-altitude Mexican habitats, winter nights are crisp and cold, frequently dropping into the low 50s or high 40s Fahrenheit (10°C to 12°C).
If you keep your lady finger cactus in a centrally heated home that maintains a uniform 72°F (22°C) year-round, the plant will remain in a perpetual vegetative state, never realizing that winter has passed, and therefore failing to produce flower buds.
To remedy this, move your cactus to a cooler location in your home from late November through early February. An unheated sunroom, a cool basement window sill, or a poorly insulated spare bedroom is ideal, provided the temperature stays consistently between 50°F and 55°F (10°C to 13°C) and never drops below freezing.
Combine this cool temperature drop with total drought—do not water the plant at all during this winter rest unless the stems begin to severe wrinkle. This combination of cold temperatures and dry soil signals to the plant’s internal biological clock that it is time to set buds for the upcoming spring.
The Right Fertilizer Strategy
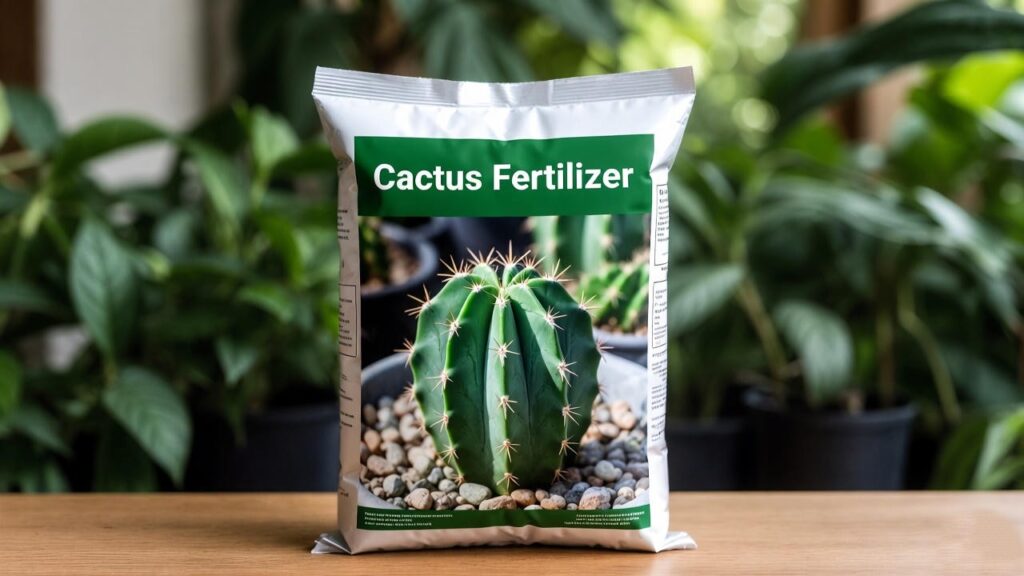
Cacti are not heavy feeders, but during their active spring and summer growth push, they greatly benefit from targeted supplemental nutrition. However, using a generic, high-nitrogen houseplant fertilizer will do far more harm than good. Nitrogen promotes rapid, watery, structural cell elongation. In a lady finger cactus, excess nitrogen results in bloated, weak stems with sparse spine coverage that are highly susceptible to splitting, cracking, and—consequently—root rot.
Instead, look for a specialized liquid fertilizer formulated specifically for cacti and succulents. These fertilizers feature a low-nitrogen, high-phosphorus, and high-potassium NPK ratio (such as 2-7-7 or 5-10-10). Phosphorus stimulates strong root development and flower bud formation, while potassium strengthens the cellular walls of the cactus epidermis, making it highly resilient against pest infestations and fungal entry.
Apply the fertilizer diluted to half of the manufacturer’s recommended strength once a month, only during May, June, and July. Always apply fertilizer to soil that is already slightly damp; applying liquid nutrients to completely parched, bone-dry soil can cause chemical fertilizer burn to the delicate, shallow root tips.
10. Propagation Made Simple: Multiplying Your Golden Clusters
One of the most rewarding aspects of caring for Mammillaria elongata is how effortlessly it self-propagates. As a mounding species, a healthy plant will naturally produce numerous offsets—affectionately known as “pups” or “fingers”—around the base of the parent stems. Over time, these pups can make the container look crowded, presenting the perfect opportunity to harvest them and create entirely new potted specimens for your collection or to gift to fellow plant enthusiasts.
Sourcing the Pups Safely
The best time to harvest offsets is during the peak active growth phase in late spring or early summer.
-
Protect Your Hands: Put on a pair of thick, puncture-resistant gardening gloves, or use a pair of kitchen tongs wrapped in silicone to gently grip the offset without damaging its golden radial spines.
-
The Twist Technique: Locate a mature, well-formed offset that is at least one to two inches in length. Grip it gently near its base where it joins the parent plant. With a firm, decisive motion, twist the offset sideways. In most cases, it will cleanly snap away from the mother plant with a minimal, pinpoint wound. If the offset is stubborn, use your sterilized hobby knife to make a clean, flush snip at the joint.
-
Treating the Mother Plant: After removing offsets, keep the parent plant completely dry for a few days to ensure the small open wounds where the pups were attached can callus over safely without being exposed to moisture.
Rooting Your New Offsets
Follow the exact same protocol used for emergency triage: allow the detached pups to callus on a paper towel for 48 hours. Once callused, place them upright in a small pot filled with your gritty, highly porous DIY substrate or pure pumice. Keep them in a bright, warm location out of direct afternoon sun, and withhold water for the first two weeks. Within a month, these offsets will develop their own independent root architectures and begin producing their own tiny, golden offsets, continuing the lifecycle of this magnificent species.
11. Frequently Asked Questions
Is the lady finger cactus toxic to cats and dogs?
Chemically, Mammillaria elongata is classified as non-toxic to domestic pets by major veterinary authorities. It contains no dangerous alkaloids or systemic toxins that would poison an animal if ingested.
However, its physical architecture poses a distinct hazard. The intricate network of radial spines is sharp and slightly hooked. If a curious cat or dog attempts to bite or play with the cactus, the spines can easily become lodged in their mouth, tongue, lips, or paws, causing mechanical injury, pain, and localized swelling. It is always best practice to display your cactus on a high shelf or secure plant stand away from pets.
Why are the golden spines on my cactus turning white or dark brown?
Spine color shifts can indicate several different environmental changes. If the spines near the base of older stems are gradually turning a dull white or gray, this is often a natural aging process known as corking, where older parts of the plant become woody and tough to support the weight of the growing cluster.
However, if the spines across the entire plant are losing their bright golden hue and turning a dirty brown or black, it is often a sign of high environmental humidity, dust accumulation, or the early stages of a fungal infection on the stem epidermis caused by stagnant air. Review your ventilation setup and ensure the plant is not being misted.
How fast does Mammillaria elongata grow indoors?
Like the vast majority of desert cacti, the lady finger cactus is a relatively slow-growing perennial. When cultivated indoors under optimal conditions with bright light and proper seasonal care, individual stems will grow roughly one-half to one inch in length per year. The plant focuses much of its energy on lateral clustering rather than extreme vertical height. It can take anywhere from five to ten years for a single starter cutting to grow into a massive, densely mounded, multi-stemmed specimen that fills a six-inch pot.
Can I use ordinary tap water to water my lady finger cactus?
If your home has municipal tap water that is relatively soft, it is perfectly safe for long-term use. However, if your home utilizes hard water that is heavily loaded with minerals like calcium and magnesium, or if your water system uses high levels of chlorine and chloramine, you may notice a white, crusty mineral build-up forming around the drainage holes of the pot or on the base of the cactus stems.
Over time, this mineral crust can alter the pH of the soil, making it difficult for the cactus to access nutrients. If you have hard tap water, try to collect rainwater for your cactus collection, or utilize distilled or filtered water once every few waterings to flush the accumulated mineral salts out of the substrate.
Conclusion: The Path to Cactus Longevity
Cultivating a thriving, beautifully structured lady finger cactus indoors is an incredibly rewarding endeavor that forces us to slow down and observe the subtle rhythms of the natural world. While the specter of root rot is a real and present danger for any desert plant kept inside a modern home, it is a problem with a definitive, structural solution.
By systematically eliminating the five critical mistakes outlined in this guide—by abandoning calendar watering, mixing a truly gritty substrate, insisting on breathable pots with functional drainage, maximizing direct solar exposure, and ensuring continuous air movement—you remove the environmental conditions that fungal pathogens require to exist. In doing so, you transform your home into a secure sanctuary where Mammillaria elongata can display its full, golden potential, rewarding your patience with structural elegance and delicate spring blooms for decades to come.