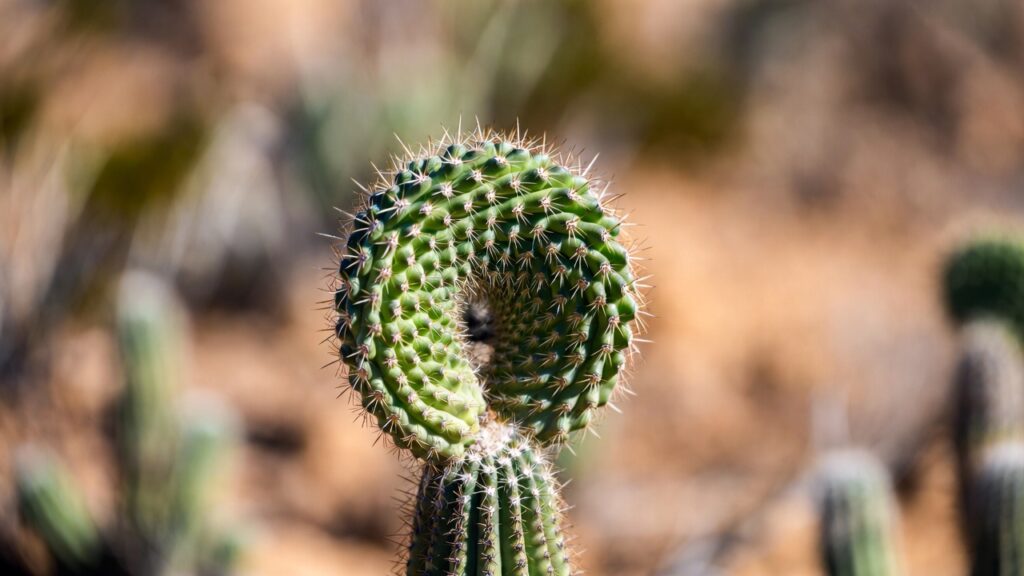
Imagine holding a living monument in the palm of your hand. In the heart of the Sonoran Desert, the iconic saguaro cactus (Carnegiea gigantea) reigns supreme, growing into a multi-ton, arms-stretched colossus that defines the American West. Yet, every single one of these desert giants begins its centuries-long journey as a tiny, shiny black speck no larger than a poppy seed. For houseplant enthusiasts looking for the ultimate horticultural challenge, planting saguaro cactus seeds indoors offers an incredibly rewarding, mindful experience.
While the idea of cultivating a desert titan on a living room windowsill is thrilling, the reality is that indoor propagation can be tricky. Without the right approach, fragile sprouts often succumb to fungal rot or severe dehydration. This skyscraper guide provides a step-by-step, mimic-the-desert blueprint to ensure high germination rates and long-term indoor survival for your seedlings.
Understanding the Saguaro Seed: Sourcing and Legality
Before you drop a single seed into a growing medium, it is vital to understand the origin and unique biology of the seed you are handling. The saguaro is a highly protected species, and understanding its legal framework is part of being an ethical indoor gardener.
Is it Legal to Harvest Wild Seeds?
In the state of Arizona, wild saguaros are strictly protected by native plant laws. Cutting down, damaging, or removing a wild saguaro is a felony. When it comes to the fruit and seeds, the law gets a bit more nuanced.
While gathering fallen fruit from public lands for personal, non-commercial use is generally tolerated in some areas, harvesting from national parks (like Saguaro National Park) or state trusts is completely illegal. Furthermore, entering private land to harvest seeds without explicit, written consent from the landowner is trespassing. As a responsible plant parent, the best practice is to entirely avoid foraging wild seeds unless you have verifiable permission and local permits.
How to Choose Viable Saguaro Cactus Seeds
Because wild harvesting carries legal risks, the most reliable and ethical route is to purchase your seeds from certified, reputable native plant nurseries or specialized succulent seed suppliers. When selecting your seeds, keep the following quality indicators in mind:
-
Appearance: Viable seeds should be a deep, glossy jet-black. They should look plump and firm under a magnifying glass, not dull, gray, or crushed.
-
Source: Look for suppliers who specialize in desert flora and state the harvest year. Avoid massive, generic online marketplaces where seeds may have spent years sitting in un-temperature-controlled fulfillment centers.
-
Sterility Risks: Old seeds suffer from a steeply declined germination rate. Fresh seeds harvested within the last 12 to 18 months will give you the highest chance of success.
The Shelf-Life Phenomenon
Interestingly, nature has adapted the saguaro to survive prolonged droughts. In the wild, if a summer monsoon season fails to arrive, the fallen seeds must wait. Botanists have discovered that if saguaro seeds are kept in a cool, dark, and perfectly dry environment, they can retain their viability for up to 20 years.
However, for indoor cultivation, freshness yields rapid, simultaneous sprouting, which makes managing your seedlings significantly easier.
Setting Expectations: The Glacial Growth Timeline
If you are looking for an instant-gratification houseplant like a pothos or a spider plant, the saguaro is not for you. Cultivating this plant is an exercise in patience and mindfulness. To succeed, you must adjust your expectations to match the plant’s natural, slow-motion rhythm.
The First Year: Inches per Decade
In the wild, a baby saguaro faces a brutal environment. To survive, it allocates almost all of its early energy underground, establishing a deep taproot to anchor itself and seek out moisture. Above the soil line, visible growth is incredibly slow.
According to data from the National Park Service, a wild saguaro takes roughly ten years to reach a mere 1.5 inches in height. Fortunately, under optimized indoor conditions—where the seedling is protected from extreme weather, pests, and prolonged drought—growth moves slightly faster, but it remains fundamentally slow:
Knowing this timeline changes how you view your plant. Your indoor saguaro will not grow into a ceiling-tall giant that takes over your living room anytime soon. Instead, it will live on your windowsill as a miniature, highly detailed, living sculpture.
Because a saguaro can live for 150 to 200 years, the seeds you plant today have the potential to become a living family heirloom passed down through generations.
The Essential Indoor Setup: Gathering Your Supplies

To successfully mimic the Sonoran Desert’s natural germination conditions inside your home, you need to assemble the proper toolkit. Using standard potting soil or generic garden pots will quickly lead to waterlogged conditions, which trigger root rot.
How to Layer Your Saguaro Sowing Pot
| Soil Layer | Material & Specifications | Purpose |
| Top Layer | Saguaro seeds + a micro-dusting of ultra-fine pumice or aquarium sand | Holds seeds securely in place while allowing vital light to trigger germination. |
| Middle Layer | 3 inches of pasteurized, inorganic-rich soil mix | Provides a sterile, fast-draining zone for young taproots to expand without rotting. |
| Bottom Layer | Shallow plastic pot with heavy drainage holes | Prevents water from pooling at the base and ensures rapid moisture evacuation. |
The Sowing Container
When starting seeds, bigger is not better. Choose shallow plastic pots or seed trays that are only 2 to 4 inches deep.
Plastic is highly recommended over terracotta for the initial germination phase because terracotta breathes too well, causing the soil to dry out too quickly before the seeds have cracked open. Ensure the container has multiple, large drainage holes at the bottom. Stagnant water at the base of the pot is the primary reason cactus seedlings fail.
The Ultimate “Desert Monsoon” Soil Recipe
In their native habitat, saguaro seeds germinate in gritty, gravelly soils that shed water almost instantly after a heavy rain. To replicate this, your substrate must be highly inorganic. Standard indoor potting soils retain far too much moisture and are packed with organic peat moss, which suffocates delicate cactus roots.
Use this custom, expert-tested soil breakdown for optimal results:
-
50% Inorganic Grit: Use a combination of fine pumice, perlite, or coarse poultry grit. This ensures sharp drainage and excellent root aeration.
-
30% Commercial Cactus/Succulent Soil: This provides a base level of structured organic matter and minimal nutrients.
-
20% Coco Coir or Peat Moss: While adult cacti dislike peat, a small percentage is highly beneficial for seeds. It holds just enough moisture to keep the seed coat soft during the critical days of germination.
Humidity & Heat Tools
Indoor home environments are generally too cool and dry for desert seed germination. To fix this, you will need to create a localized microclimate:
-
Humidity Vault: A simple plastic zip-top bag (Gallon size) or a dedicated seed propagation dome with adjustable vents works perfectly to trap moisture.
-
Seedling Heat Mat: Saguaros require consistent, warm soil temperatures to break dormancy. A basic, waterproof horticulturist heat mat placed under your pots will provide the steady bottom heat required to mimic sun-baked desert earth.
Step-by-Step: How to Germinate Saguaro Cactus Seeds

With your supplies gathered, you are ready to begin the sowing process. Follow this chronological, step-by-step procedure carefully to optimize your germination rates.
Step 1: Sterilizing the Substrate
Because you will be keeping the soil warm and highly humid for several weeks, any hidden mold spores, fungus gnat larvae, or bacteria present in the soil will multiply rapidly. To protect your vulnerable seedlings, pasteurize your soil mix before planting.
Fill your chosen pot with the moist soil mix, cover it with a microwave-safe wrap, and microwave it on high for 90 to 120 seconds. Alternatively, bake it in an oven-safe dish at 200°F (93°C) for 30 minutes. Allow the soil to cool completely to room temperature before moving to the next step.
Step 2: Hydrating the Soil
If you attempt to water your pots after sowing the seeds, the water stream will wash the microscopic seeds away or bury them deep underground. Instead, hydrate the soil beforehand.
Place your sterilized pot into a shallow tray filled with distilled water. Allow the soil to draw moisture upward through the bottom drainage holes via capillary action until the top surface of the soil looks visibly damp. Remove the pot from the water tray and let any excess water drain freely for 10 minutes.
Step 3: Surface Sowing (No Burying!)
Open your packet of seeds and carefully scatter them across the damp soil surface. Aim to space them roughly 1/4 to 1/2 inch apart.
Step 4: Creating the Humidity Vault
Slide the entire planted pot into your clear plastic zip-top bag, or place it under your propagation dome. Seal it tightly. This locks in 100% relative humidity, simulating the intense, humid atmosphere of the Arizona summer monsoon season. As long as the bag remains sealed, you will not need to water the pot again for weeks.
Step 5: Temperature and Light Placement
Place your sealed container directly onto your seedling heat mat. Ideally, you want to maintain a stable substrate temperature between 75°F and 85°F (24°C to 29°C).
Position the setup under a full-spectrum LED grow light set on a timer for 14 hours of light per day, or place it on a bright windowsill that receives plenty of bright, indirect light (such as an east-facing window). Avoid placing the sealed plastic bag in direct, intense afternoon southern sun, as the trapped air can quickly overheat and cook the seeds.
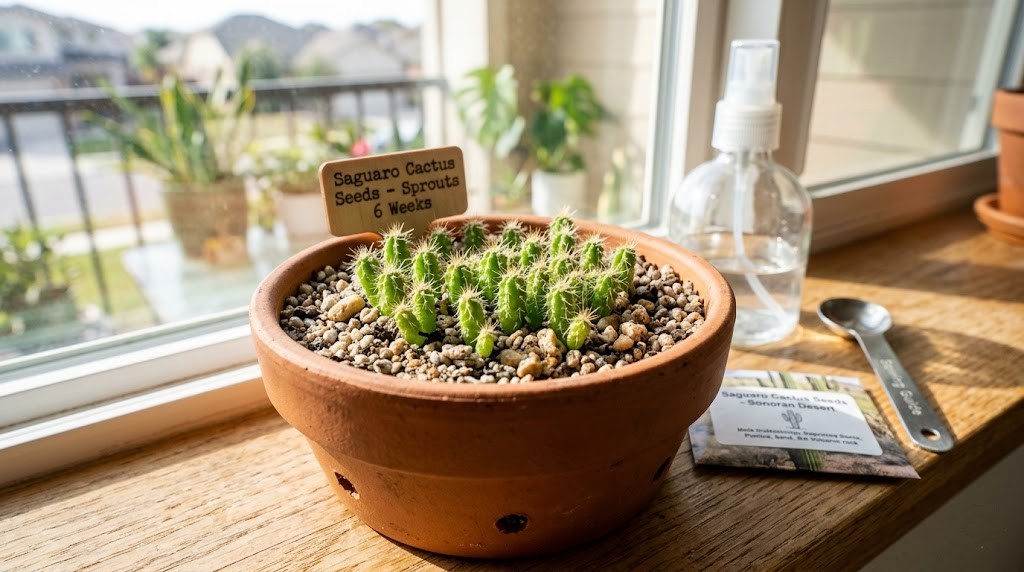
Post-Germination Care: Nurturing Your Tiny Sprouts

Within 5 to 14 days, you will notice the first signs of success. The glossy black seeds will split, and tiny, neon-green spheres will emerge. These are the cotyledons. Once they appear, the clock starts ticking on your transition from a closed humidity system to an open, arid environment.
Acclimatizing to Indoor Air (Hardening Off)
Leaving the seedlings inside a sealed plastic bag indefinitely is a recipe for disaster. As the sprouts grow, they require fresh air exchange to strengthen their cell walls and prevent fungal attacks.
Once roughly 70% of your seeds have sprouted, begin the process of “hardening off.” Use a pin to poke a few small holes in the top of the plastic bag. Every few days, widen the holes or open the zipper slightly. Over a period of two to three weeks, slowly introduce the seedlings to the ambient humidity of your room until you can remove the bag entirely without shocking the plants.
The Delicate Art of Watering Baby Saguaros
While an adult saguaro prefers its soil to remain completely bone-dry for weeks at a time, baby seedlings do not have large internal water storage tanks yet. If their soil dries out completely for more than a day or two during their first few months of life, they will shrivel up and die.
-
How to Water: Never pour water directly over the top of the seedlings. Use a clean spray bottle set to an ultra-fine mist to gently moisten the surface soil, or continue to use the bottom-watering method by placing the pot in a shallow saucer of water for a few minutes.
-
The Balance: Keep the soil consistently, slightly damp—similar to a wrung-out sponge—for the first two to three months. As they approach their six-month mark and start developing distinct, vertical ridges and baby spines, you can begin letting the top half-inch of soil dry out completely between waterings.
The “Nurse Bush” Strategy Indoors
In the wild, a baby saguaro almost never grows out in the open desert sun. It would quickly be scorched or eaten. Instead, they germinate beneath the canopy of a “nurse tree,” such as a Palo Verde, Jojoba, or Creosote bush. This canopy filters the harsh sunlight, tempers the wind, and keeps the soil slightly cooler.
You can mimic this natural phenomenon indoors by placing your pot of seedlings behind a larger, leafy houseplant (like a pothos or a jade plant) on your windowsill. This allows them to receive dappled, bright light without being stressed by intense, direct sunbeams.
Long-Term Maintenance: Keeping Your Saguaro Healthy

Once your saguaro seedlings cross the six-month threshold, they transition from fragile sprouts into resilient, miniature cacti. While they require less daily supervision at this stage, maintaining a proper environmental routine is critical to prevent stunted growth or sudden decline.
Seasonal Watering Schedules
As your saguaro develops its internal water-storing tissues, your watering habits must shift from keeping the soil continuously moist to mimicking the dramatic wet-and-dry cycles of the desert. Cacti do not drink water constantly; they absorb large amounts during brief periods, store it in their fleshy stems, and then rely on that storage during extended dry spells.
-
Spring and Summer (Active Growth): This is when your saguaro does the majority of its growing. Water the plant thoroughly using the “soak and dry” method. Pour water over the substrate until it runs freely out of the bottom drainage holes, then let the soil dry out 100% all the way to the bottom of the pot before watering again. Depending on your home’s ambient humidity and airflow, this usually means watering once every two to three weeks.
-
Autumn and Winter (Dormancy): In the wild, winter temperatures drop, and the saguaro enters a state of rest. Indoors, you must replicate this dormancy to prevent the plant from growing weak, stretched tissue. Drastically cut back on watering. From November through March, water your saguaro only once or twice. The soil should remain completely dry for weeks at a time. Do not worry about the cactus shriveling slightly; this contraction is a natural defense mechanism against winter cold and rot.
Indoor Lighting Requirements
Light is the single most crucial factor for a young saguaro’s long-term survival indoors. Inadequate light causes a condition known as etiolation, where the cactus stretches vertically toward the light source, becomes pale green or yellow, narrows at the top, and develops weak, sparse spines. An etiolated cactus is structurally compromised and highly susceptible to diseases.
To keep your saguaro compact, robust, and beautifully spined, aim for a minimum of 12 to 14 hours of bright light daily.
-
Natural Light: The absolute best location in a home is a completely unobstructed, south-facing windowsill. West-facing windows are a good secondary option, providing intense afternoon heat and light. Rotate the pot 90 degrees every single week to ensure all sides of the cactus receive equal exposure, preventing the stem from leaning toward the glass.
-
Supplemental Lighting: Because standard home window glass filters out a significant portion of ultraviolet light, supplementing with artificial lights is highly recommended, especially during dark winter months. Position a full-spectrum LED grow light roughly 6 to 12 inches directly above the top of the cactus. Look for grow lights rated for high-output PPFD (Photosynthetic Photon Flux Density) to ensure your desert native receives the light intensity it craves.
When to Repot
Saguaro seedlings have very small root systems relative to their size, and they absolutely thrive when their roots are slightly confined. Repotting too early or moving the plant into a massive container introduces an unnecessary volume of soil that holds onto water for too long, creating an environment ripe for root rot.
Plan to repot your indoor saguaro only once every two to three years. The best time to transition the plant is in the late spring or early summer, when its active metabolism allows it to quickly heal any minor root damage sustained during the move.
When upgrading, choose a new container that is only one size larger—roughly 1 inch wider in diameter than the current pot. Gently untangle the outer roots, clear away old, compacted soil, and settle the plant into fresh, gritty substrate at the exact same soil level it was sitting at previously. Never bury the green stem below the soil line, as moisture trapped against the stem tissue will cause it to decay. After repotting, wait a full week before watering to allow any bruised or broken roots to dry out and callus over safely.
Troubleshooting Common Problems
Even with precise care, growing desert flora in an indoor environment can present challenges. Because saguaros grow in slow motion, they also show signs of stress slowly. Recognizing these early visual symptoms allows you to adjust your care routine before damage becomes permanent.
Symptom: Seedlings are Turning Red, Purple, or Deep Bronze
-
The Cause: This coloration is caused by anthocyanins, which act as a natural sunscreen for the plant. It indicates that the young seedling is experiencing light stress or mild temperature stress. While adult saguaros bask in intense sun, young seedlings under a year old can easily become overwhelmed by sudden exposure to powerful grow lights or intense afternoon window heat.
-
The Fix: Do not panic; this is an early warning sign, not an immediate death sentence. Move your grow light a few inches further away from the container, or place a sheer curtain between the window glass and the pot to diffuse the light. Within a few weeks, the intense red or purple hue should fade back into a healthy, vibrant green.
Symptom: Sprouting Stems Turn Translucent, Soft, and Collapse
-
The Cause: This is the classic signature of a fungal disease known as “damping-off,” typically caused by soil-borne pathogens like Pythium or Rhizoctonia. It occurs when the soil mix is kept too wet for too long, or when air circulation is nonexistent within a closed humidity dome or bag.
-
The Fix: Once a tiny seedling turns mushy and collapses, it cannot be saved. Immediately remove and discard any infected seedlings using sterile tweezers to stop the fungus from spreading through the soil. Increase the airflow immediately by removing the humidity cover entirely, let the soil dry out completely, and mist the remaining healthy seedlings with a very dilute, organic antifungal treatment, such as cooled chamomile tea or a light copper fungicide spray.
Symptom: Seeds Have Not Sprouted After Three Weeks
-
The Cause: If three weeks pass without a single green speck appearing, your seeds are likely stuck in dormancy. This is usually caused by two common mistakes: either the soil temperatures are too cold (below 70°F or 21°C), or the seeds were covered with soil during planting, blocking the light required to trigger germination.
-
The Fix: Check the actual temperature of your substrate using a soil thermometer. If the soil is cool, place the container on a dedicated seedling heat mat or move it to a warmer room in your home. If you accidentally buried the seeds, use a fine misting bottle to gently wash away the top layer of grit and expose the black seeds to the light once more.
Symptom: The Top of the Cactus is Growing Narrow, Pointed, and Pale
-
The Cause: This is etiolation, the physical manifestation of light starvation. The plant is literally exhausting its internal energy reserves to stretch upward as fast as possible in a desperate attempt to find a stronger light source.
-
The Fix: Move the cactus to your brightest south-facing window immediately, or install a high-quality LED grow light directly above it. Note that while you can halt etiolation and restore healthy, thick growth to the new sections of the plant, the narrow, stretched portion of the stem will remain permanently thin.
Frequently Asked Questions (FAQs)
Can a saguaro cactus grow to its full size completely indoors?
No, a saguaro will not reach its iconic, multi-ton, armed outdoor size inside a home. In the wild, saguaros require immense amounts of unfiltered solar radiation, deep soil beds for their extensive root systems, and decades of exposure to natural weathering. Indoors, restricted by the boundaries of a pot and filtered indoor light, a saguaro naturally scales down its growth. It will remain a beautiful, slow-growing, miniature indoor statement piece that comfortably fits on a windowsill or tabletop for your entire lifetime.
How many saguaro seeds actually survive to adulthood?
In the brutal, unforgiving environment of the Sonoran Desert, the odds are heavily stacked against the plant. It is estimated that out of the roughly 40 million seeds a single wild saguaro produces over its lifespan, only one will successfully survive to become a mature, reproducing adult. The rest are eaten by desert wildlife, washed away by flash floods, or scorched by extreme heat. Indoors under your care, protected from predators and extreme weather, the survival rate is dramatically higher—often reaching 50% to 80% if proper pasteurization and watering protocols are followed.
Do I need to fertilize saguaro seedlings?
Do not feed your saguaro seedlings at all during their first six months of life. At this early stage, their metabolic rate is incredibly low, and the delicate root systems can easily be chemically burned by fertilizer salts. After the six-month mark, you can introduce nutrients very sparingly. Once a year during the peak of the summer growth season, apply a highly diluted, low-nitrogen liquid succulent fertilizer mixed at just one-quarter of the manufacturer’s recommended strength. Never fertilize during the autumn or winter dormancy period.
What should I do if white crust builds up on the soil or pot?
A white, powdery crust appearing on the surface of your gritty soil mix or around the drainage holes of the pot is a build-up of mineral deposits and salts. This typically happens if you water your plants with hard tap water. Over time, these mineral accumulations can alter the soil pH and make it difficult for the cactus to absorb nutrients. Switch to watering your saguaro with distilled water, rainwater, or reverse-osmosis filtered water to prevent this build-up and keep the roots healthy.
Conclusion
Growing a saguaro cactus from a tiny seed is a profound journey that connects you directly to the slow, enduring rhythm of the American desert. It is an intentional, mindful project that contrasts beautifully with the fast-paced nature of modern life. By carefully simulating a desert monsoon during the initial sprouting phase, providing exceptionally well-draining, gritty soil, and ensuring your windowsill offers a steady supply of bright light, you can successfully rear these slow-motion giants right in your living room.
While you won’t see dramatic changes overnight, the quiet satisfaction of watching a microscopic seed slowly transform into a spiky, independent, and resilient desert survivor is one of the most unique and fulfilling milestones any indoor gardener can achieve. Gather your supplies, clear off your sunniest windowsill, and start your own miniature desert legacy today.