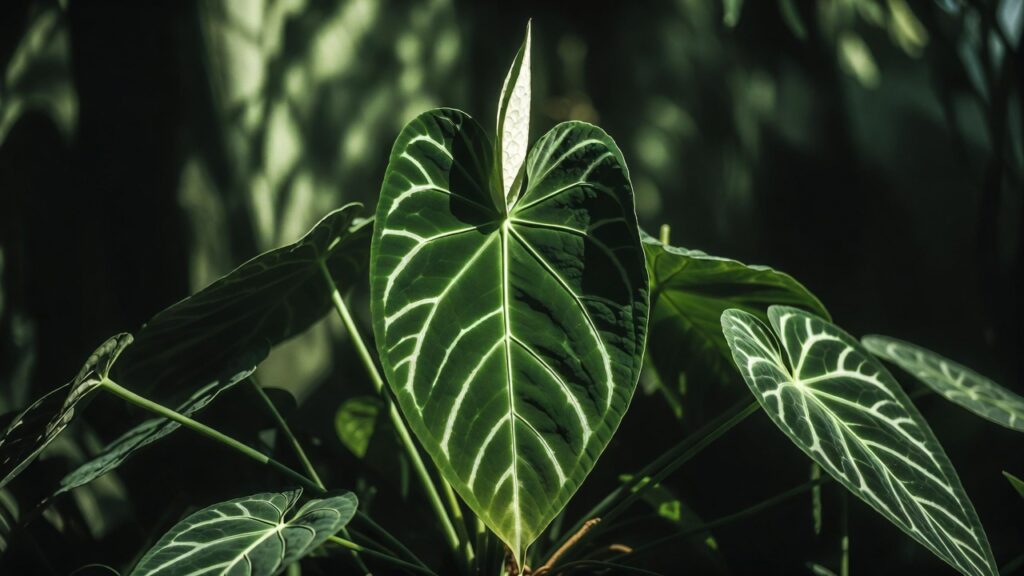
Few houseplants stop people in their tracks the way anthurium clarinervium does. With its thick, velvety, heart-shaped leaves etched in bold white veins, it looks less like a plant and more like living art. Yet for many indoor gardeners, that beauty quickly turns into frustration — yellowing leaves, root rot, brown edges, or painfully slow growth.
If you’ve struggled with your anthurium clarinervium, you’re not alone.
This comprehensive, expert-backed guide will show you exactly how to grow a healthy, thriving plant indoors — without the common mistakes that cause most problems. Drawing from horticultural best practices and real-world indoor growing experience, we’ll cover lighting, watering, soil mix, humidity, fertilizing, repotting, troubleshooting, and propagation — in greater depth than most standard care guides.
By the end, you’ll understand not just what to do, but why it works.
What Is Anthurium Clarinervium? (Plant Profile & Key Characteristics)
Before diving into care, it’s important to understand how this plant grows in nature. Most indoor care failures happen because we treat it like a typical tropical foliage plant — when it isn’t.
Botanical Background
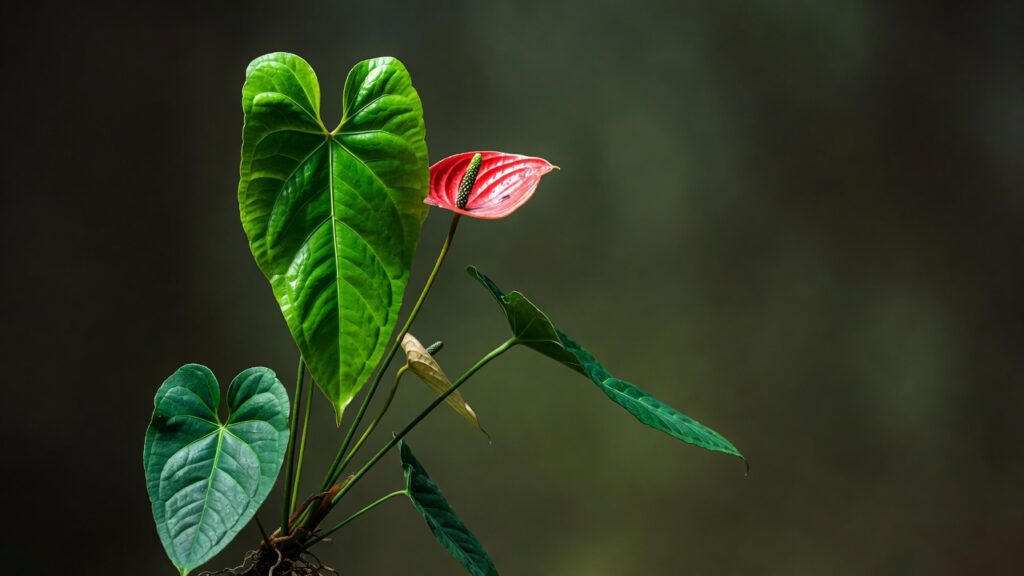
Anthurium clarinervium is native to southern Mexico, where it grows on limestone cliffs and rocky forest floors. Unlike moisture-loving jungle plants that sit in dense, soggy soil, this species often grows:
- In well-draining, mineral-rich substrates
- In bright, filtered light
- With strong air circulation
- In warm temperatures but not constantly wet conditions
This semi-lithophytic nature explains why heavy potting soil and frequent watering often lead to root rot indoors.
Understanding its habitat is the foundation of proper care.
Identifying Features
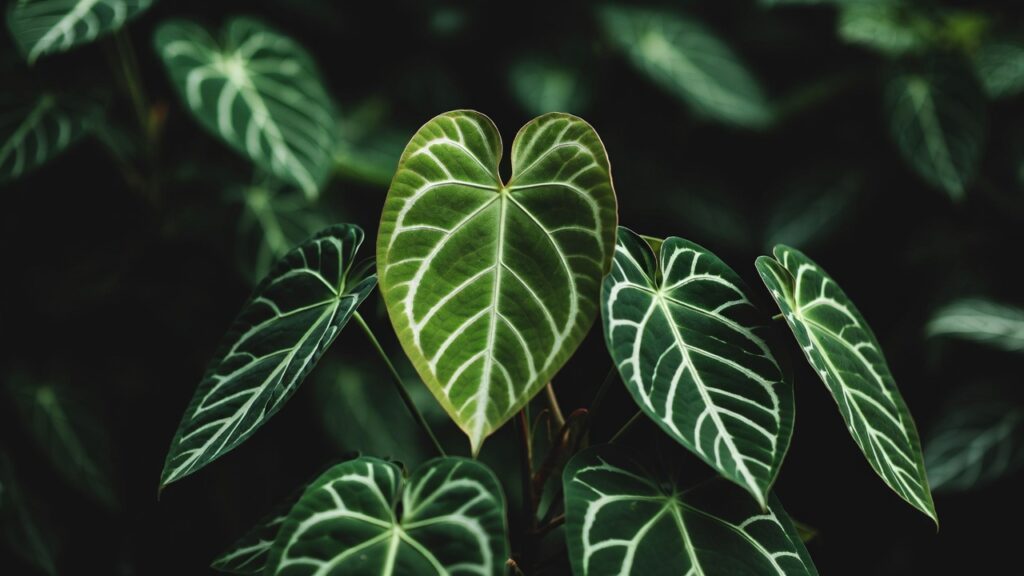
- Thick, velvety, heart-shaped leaves
- Bold white or silvery venation
- Compact, upright growth habit
- Relatively slow but steady growth
- Thick, sturdy petioles
Mature indoor plants typically reach 12–24 inches tall, with leaves that can grow 6–10 inches long when conditions are optimal.
Anthurium Clarinervium vs Similar Velvet Anthuriums
Many growers confuse it with other velvet-leaf anthuriums.
Clarinervium vs Crystallinum
- Clarinervium has thicker, more rigid leaves
- Crystallinum has thinner, more elongated foliage
Clarinervium vs Magnificum
- Magnificum leaves are often larger and more elongated
- Clarinervium leaves are more rounded and compact
Correct identification matters because care tolerances vary slightly between species.
Ideal Growing Conditions for Anthurium Clarinervium Indoors
If you master this section, you’ll prevent 90% of common problems.
Light Requirements (The Most Important Factor)
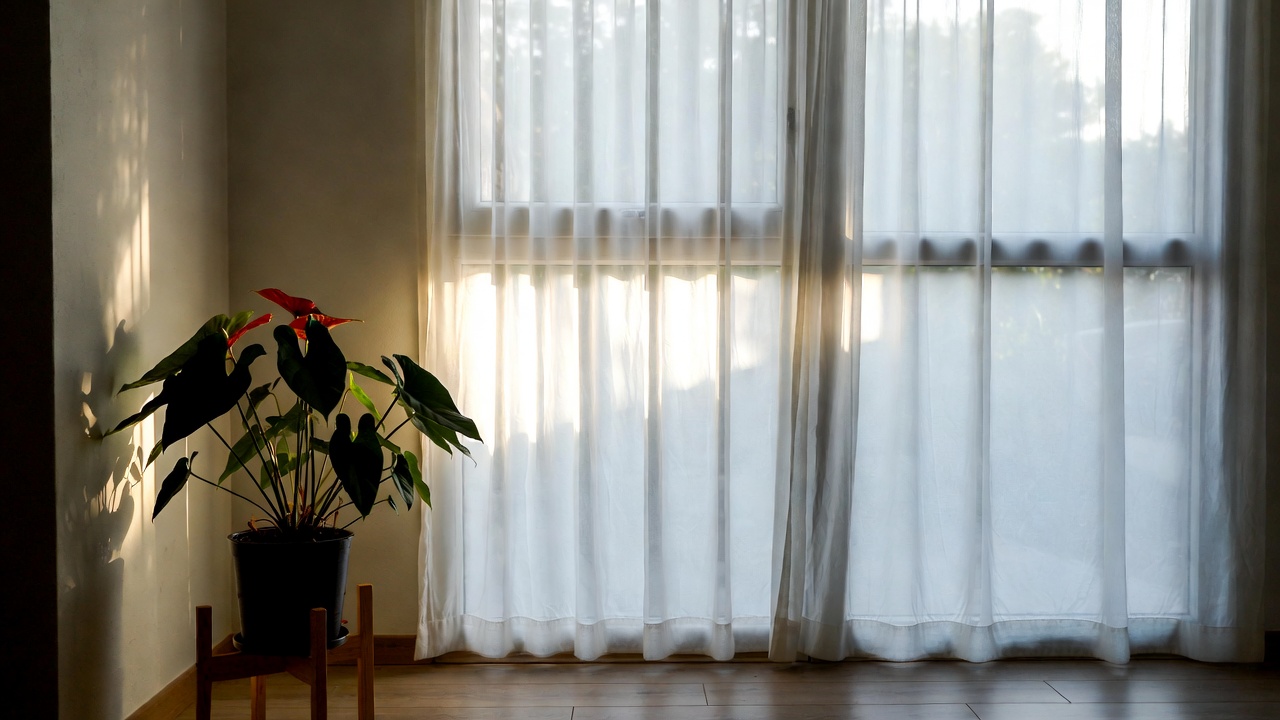
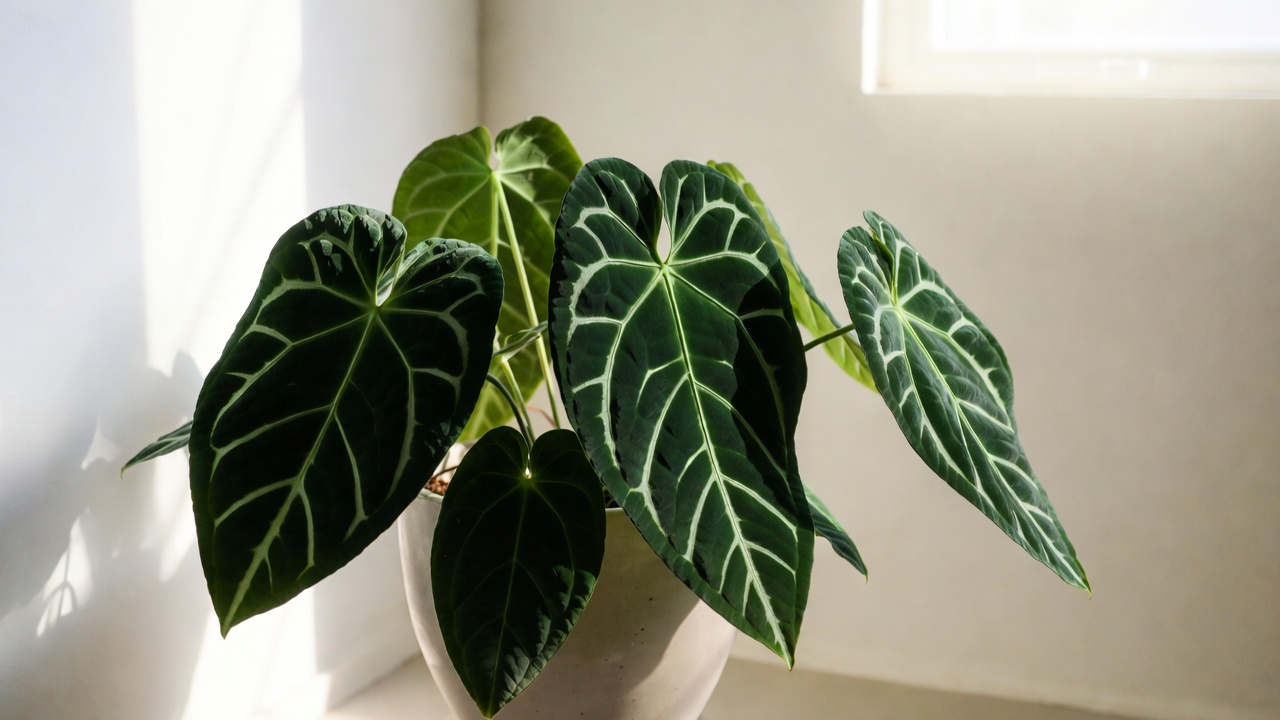
Anthurium clarinervium thrives in bright, indirect light.
Think of filtered forest light — not deep shade, and not harsh direct sun.
Ideal placement:
- East-facing window
- North-facing window
- South or west window with sheer curtain
Too little light results in:
- Slower growth
- Smaller leaves
- Dull coloration
Too much direct sun causes:
- Leaf scorch
- Brown patches
- Faded velvety texture
If you can comfortably read a book without turning on a light during the day, your plant likely has adequate brightness.
For homes with limited natural light, full-spectrum grow lights positioned 12–18 inches above the plant work extremely well.
Soil Mix: The #1 Secret to Prevent Root Rot
This is where most people fail.
Regular potting soil holds too much moisture for anthurium clarinervium. Because its roots require oxygen, soggy soil suffocates them quickly.
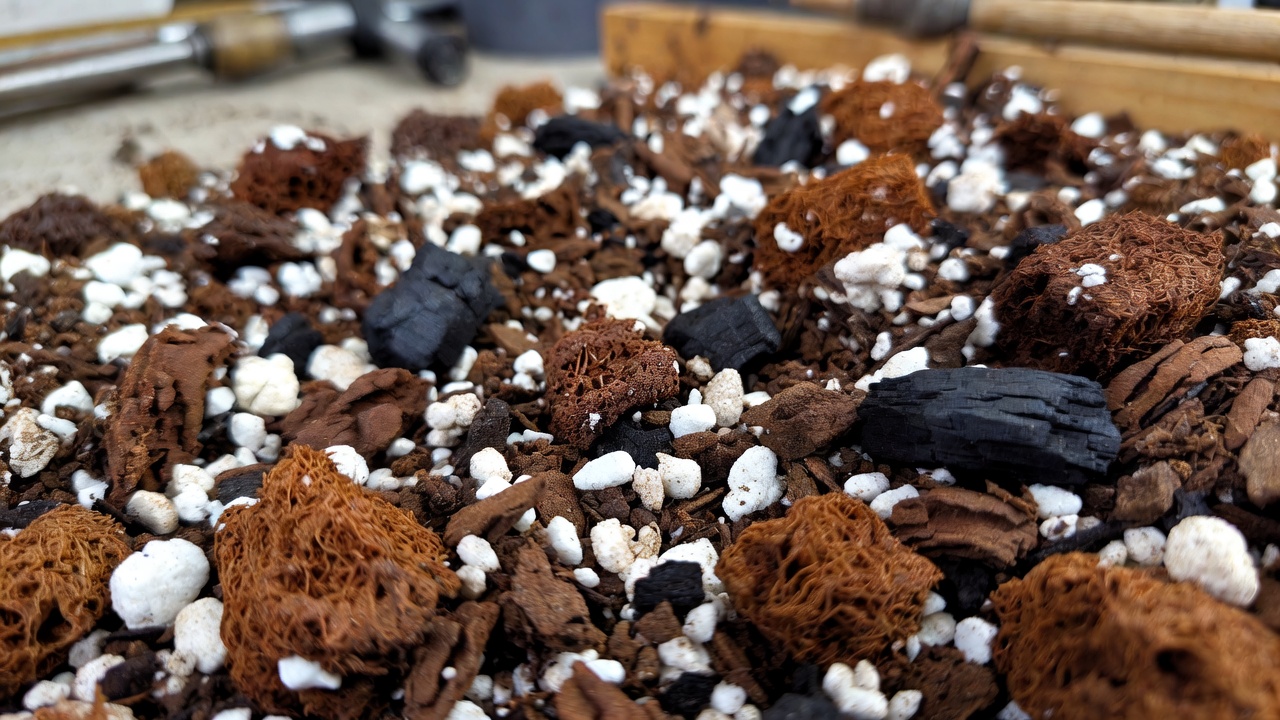
Ideal Chunky Aroid Mix Recipe
A well-draining mix should include:
- 40% orchid bark
- 20% perlite or pumice
- 20% coco coir or peat moss
- 10% horticultural charcoal
- 10% compost or worm castings
This type of mix:
- Drains quickly
- Retains slight moisture
- Allows airflow to roots
- Prevents compaction
If water sits on top of the soil for more than a few seconds before draining, your mix is too dense.
Watering Schedule (How to Avoid Overwatering)

Overwatering is the most common cause of decline.
Instead of watering on a schedule, water based on soil moisture.
The Correct Method:
- Insert your finger 1–2 inches into the soil.
- If the top layer feels dry, water thoroughly.
- Allow excess water to drain completely.
- Never let the plant sit in standing water.
General frequency:
- Spring/Summer: every 7–10 days
- Fall/Winter: every 10–14 days
But always adjust based on light, humidity, and temperature.
Signs of Overwatering:
- Yellow lower leaves
- Mushy stems
- Foul smell from soil
- Wilting despite wet soil
Signs of Underwatering:
- Slight drooping
- Crispy edges
- Soil pulling away from pot sides
Anthurium clarinervium prefers to dry slightly between waterings — not bone dry, and never soggy.
Humidity Needs (Protecting the Velvet Texture)
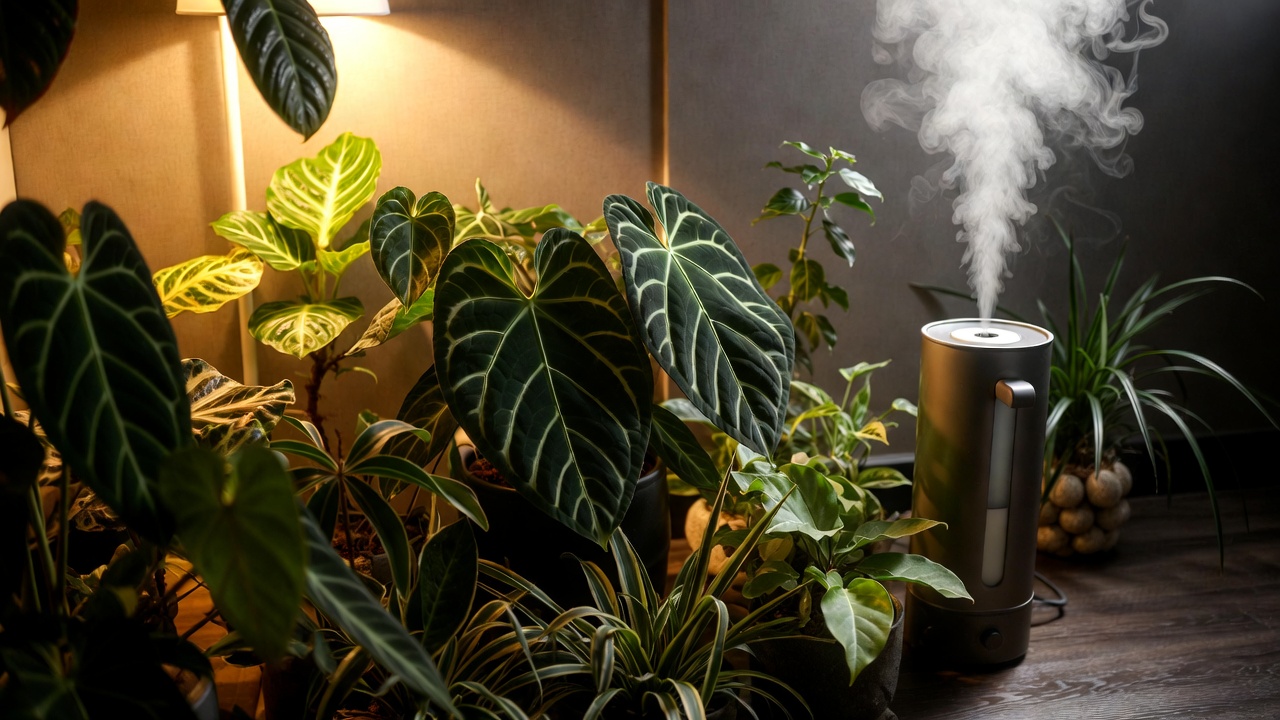
This plant thrives at 60–80% humidity.
Below 50%, you may notice:
- Brown leaf edges
- Curling
- Slower growth
While it can survive in average home humidity (40–50%), higher humidity improves leaf size and texture dramatically.
Practical Ways to Increase Humidity:
- Use a room humidifier
- Group plants together
- Place on a pebble tray (minor boost)
- Grow inside a glass cabinet
Avoid misting directly onto velvety leaves — it can cause spotting.
Temperature Tolerance
Ideal temperature range:
- 65–80°F (18–27°C)
Avoid:
- Cold drafts
- Air conditioning vents
- Sudden temperature swings
Temperatures below 55°F can cause stress and long-term damage.
Fertilizing Anthurium Clarinervium for Strong Growth
Because it grows slowly, over-fertilizing is a common mistake.
Best Fertilizer Type
Use:
- Balanced liquid fertilizer (10-10-10 or 20-20-20)
- Diluted to half strength
Organic options like fish emulsion or worm castings also work well.
Feeding Schedule
- Every 4–6 weeks during spring and summer
- Stop or reduce feeding in winter
Flush the soil with distilled water every few months to prevent salt buildup.
Signs of Nutrient Deficiency
- Pale new leaves
- Reduced leaf size
- Sluggish growth
Less is more. Always err on the side of caution.
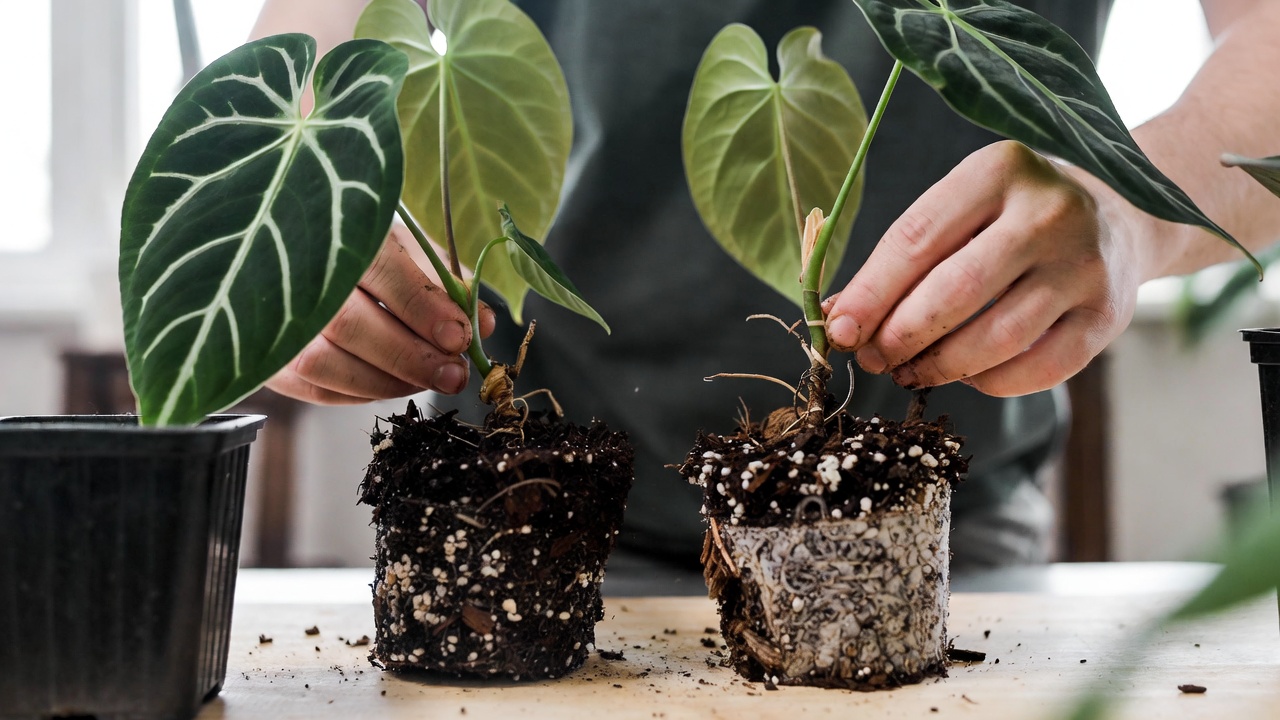
Repotting Anthurium Clarinervium (Step-by-Step Guide)
Repot every 1–2 years or when roots circle the pot.
When to Repot
- Roots emerging from drainage holes
- Water running straight through pot
- Stunted growth despite proper care
Best time: early spring.
Choosing the Right Pot
- Must have drainage holes
- Only 1–2 inches larger than current pot
- Terracotta improves airflow
- Plastic retains moisture longer
Step-by-Step Process
- Prepare fresh chunky mix.
- Gently remove plant.
- Inspect roots; trim black or mushy sections.
- Place into new pot at same depth.
- Lightly water to settle soil.
After repotting, avoid fertilizing for 4 weeks.
Common Problems and How to Fix Them
Even with good care, issues can arise. Here’s how to diagnose them accurately.
Yellow Leaves
Causes:
- Overwatering
- Poor drainage
- Natural aging (bottom leaves)
Solution:
- Check roots
- Improve soil aeration
- Adjust watering frequency
Brown Leaf Edges
Usually caused by:
- Low humidity
- Salt buildup
- Inconsistent watering
Flush soil and increase humidity.
Drooping Leaves
Often due to:
- Root stress
- Sudden environmental change
- Temperature shock
Check soil moisture and root health first.
Root Rot (Emergency Rescue Plan)
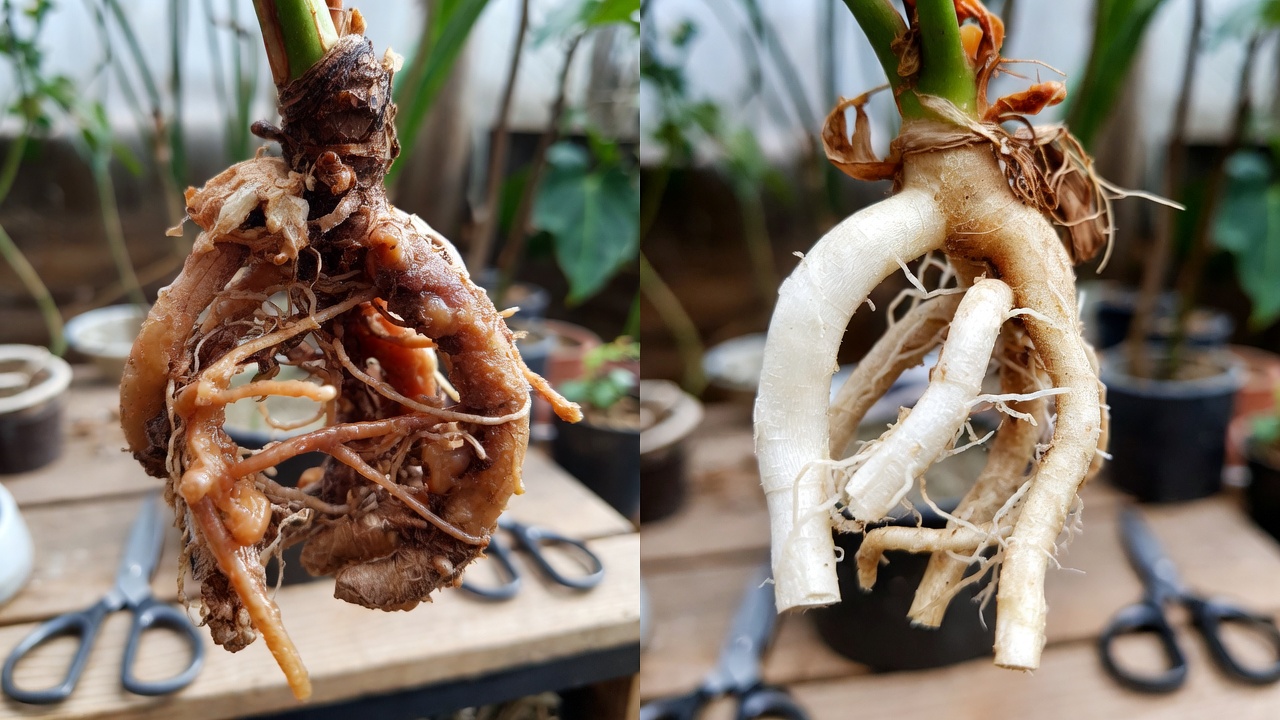
- Remove plant immediately.
- Wash off old soil.
- Trim all rotten roots.
- Repot in fresh, dry chunky mix.
- Reduce watering significantly.
Act quickly — early intervention can save the plant.
Pests: Spider Mites, Mealybugs, Thrips
Inspect undersides of leaves weekly.
Treatment options:
- Neem oil
- Insecticidal soap
- Manual removal with alcohol swab
Isolate infected plants immediately.
How to Propagate Anthurium Clarinervium Successfully
Propagation is possible — but only under the right conditions. Unlike pothos or philodendron, you cannot grow anthurium clarinervium from a simple leaf cutting.
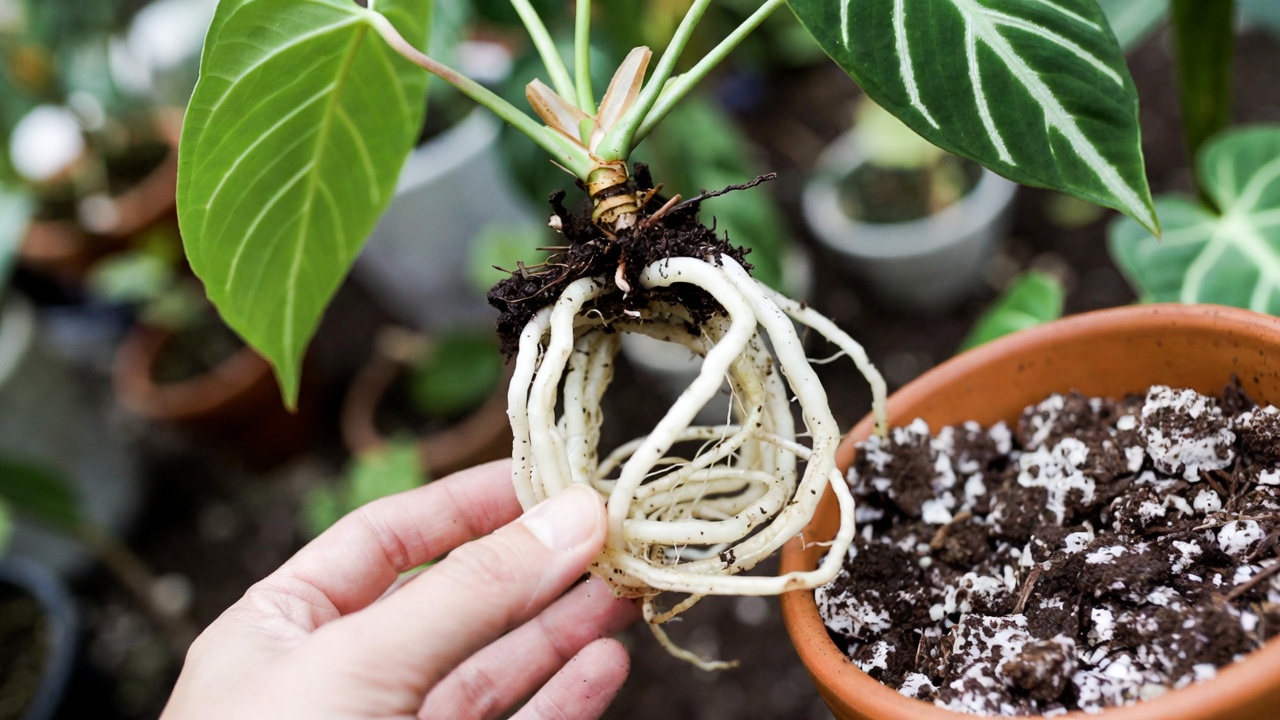
Division Method (Most Reliable Technique)
The only dependable way to propagate this plant is through division, and it must have multiple growth points.
When Is It Ready?
Your plant can be divided when:
- It has at least two separate stems or crowns
- You see distinct root systems attached to each section
- It is mature and actively growing (spring or early summer is ideal)
Step-by-Step Division Process
- Remove the plant from its pot.
- Gently loosen soil around the roots.
- Identify natural separation points.
- Carefully pull or cut apart sections using sterile scissors.
- Ensure each division has healthy roots.
- Repot each division in fresh chunky aroid mix.
- Water lightly and place in bright indirect light.
Avoid fertilizing for 3–4 weeks after propagation.
Why Leaf Cuttings Don’t Work
Unlike vining aroids, anthurium clarinervium does not regenerate from a single leaf without a node. Many online myths suggest water propagation from leaves — but without a growth node, new roots and shoots cannot form.
Understanding this prevents wasted time and disappointment.
Growth Rate and What to Expect Over Time
Anthurium clarinervium is not a fast grower — and that’s completely normal.
How Fast Does It Grow?
Under ideal indoor conditions:
- 2–4 new leaves per year
- Faster growth in spring and summer
- Slower or dormant growth in winter
Growth depends heavily on:
- Light intensity
- Humidity levels
- Root health
- Fertilization routine
Leaf Size Progression
New leaves typically emerge smaller and expand as they mature. With optimal care, leaf size increases gradually each year.
Don’t be discouraged if growth seems slow. A healthy, slow-growing plant is far better than a fast-growing stressed one.
Is Anthurium Clarinervium Beginner-Friendly?
Honest answer: It’s intermediate.
While not impossible for beginners, it requires more precision than common houseplants like pothos or snake plants.
Best Suited For:
- Plant owners comfortable monitoring soil moisture
- Growers willing to use well-draining aroid mixes
- Those able to provide bright indirect light
- Homes with moderate to high humidity
If you’re just starting your indoor plant journey, consider gaining experience with philodendrons or monstera first.
However, with the right knowledge — which you now have — beginners can succeed.
Styling and Display Ideas for Maximum Visual Impact
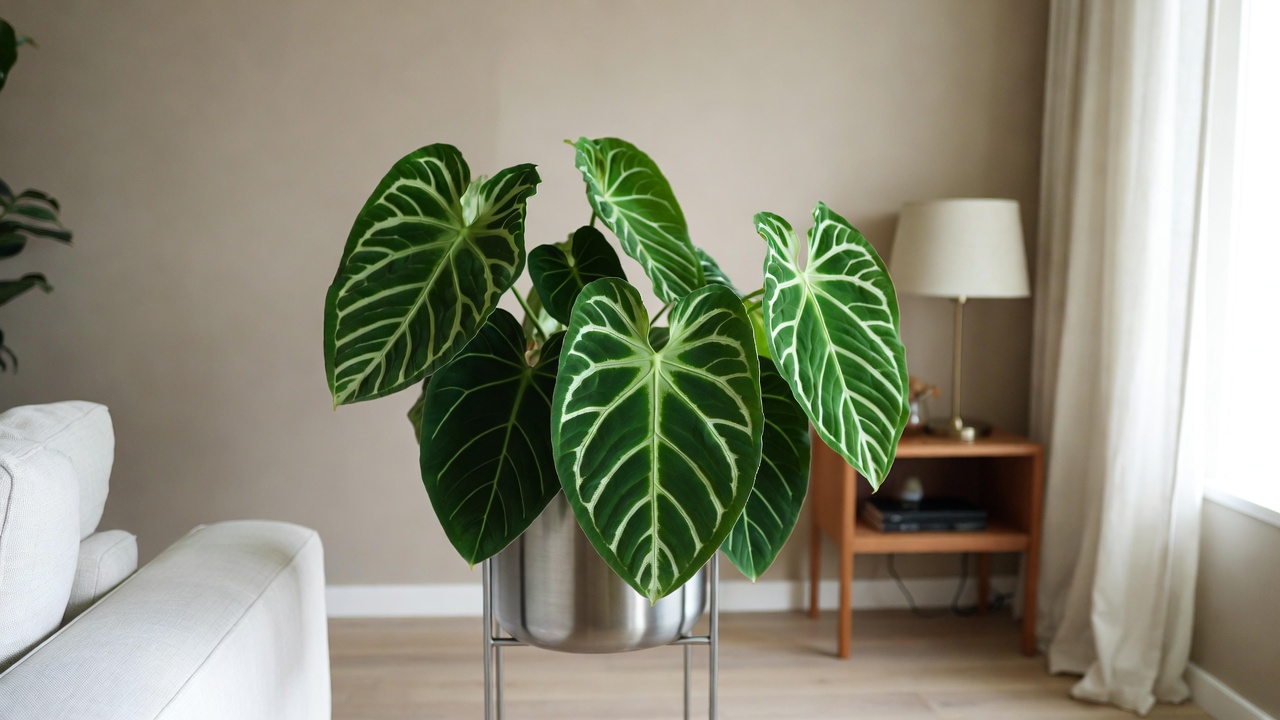
Because of its dramatic foliage, anthurium clarinervium works beautifully as a statement plant.
Decorative Pot Pairings
- Matte ceramic pots (white or charcoal)
- Textured clay pots
- Minimalist concrete planters
Avoid overly colorful containers that compete with its bold leaf pattern.
Placement Tips
- On a plant stand near an east-facing window
- On a floating shelf with trailing plants nearby
- In a glass cabinet for high humidity display
- As a standalone accent on a side table
Its architectural leaves complement modern, Scandinavian, and minimalist interiors exceptionally well.
Expert Tips for Keeping Anthurium Clarinervium Thriving Year-Round
After years of growing velvet anthuriums indoors, these small adjustments make a significant difference.
1. Rotate the Plant Monthly
This ensures even growth and prevents leaning toward light.
2. Clean Leaves Carefully
Dust blocks light absorption. Use:
- A soft microfiber cloth
- Slightly damp (not soaked)
- Gently wipe — avoid damaging velvet texture
Never use leaf shine products.
3. Monitor Roots, Not Just Leaves
Healthy roots are:
- White or light tan
- Firm
- Odorless
If roots are healthy, most leaf issues can be corrected.
4. Adjust Care Seasonally
Spring/Summer:
- Increase watering slightly
- Resume fertilizing
- Monitor faster growth
Fall/Winter:
- Reduce watering
- Stop fertilizing
- Protect from cold drafts
Consistency is key.
Frequently Asked Questions
How often should I water anthurium clarinervium?
Water when the top 1–2 inches of soil feel dry. This typically means every 7–10 days in growing season and every 10–14 days in winter.
Why are my anthurium clarinervium leaves turning yellow?
The most common cause is overwatering. Check root health and ensure your soil drains properly.
Does anthurium clarinervium need high humidity?
Yes. It thrives at 60–80% humidity but can survive at 40–50% with minor leaf edge browning.
Can anthurium clarinervium grow in low light?
It can survive in low light but will grow slowly and produce smaller leaves. Bright indirect light is ideal.
Is anthurium clarinervium toxic to pets?
Yes. Like other aroids, it contains calcium oxalate crystals and is toxic if ingested by pets or humans.
How fast does anthurium clarinervium grow?
Expect a few new leaves per year under optimal indoor conditions.
What is the best soil for anthurium clarinervium?
A chunky, well-draining aroid mix containing orchid bark, perlite, coco coir, and charcoal works best.
Quick Care Summary (Cheat Sheet)
Light: Bright indirect light
Water: When top 1–2 inches dry
Humidity: 60–80% ideal
Soil: Chunky, well-draining aroid mix
Temperature: 65–80°F
Fertilizer: Half-strength every 4–6 weeks (spring/summer)
Difficulty: Intermediate
Final Thoughts: Grow Anthurium Clarinervium with Confidence
Anthurium clarinervium is not difficult — it’s just misunderstood.
Most problems stem from:
- Heavy soil
- Overwatering
- Insufficient light
Once you replicate its natural environment — airy substrate, bright filtered light, moderate watering, and good humidity — it becomes surprisingly resilient.
Growing this velvet-leaf beauty successfully isn’t about luck. It’s about understanding how it wants to live.
Apply these principles consistently, observe your plant closely, and adjust gradually. With proper care, your anthurium clarinervium will reward you with bold, flawless foliage that transforms your indoor space.