Indoor plants bring beauty and life to any space, but they can quickly become a magnet for pests if not properly cared for.  Have you noticed tiny insects crawling on your plant leaves, or are your once-healthy greens starting to look a little droopy and discolored? These could be signs of pest problems!
Pest identification for indoor plants is the first crucial step in protecting your plants from the damage caused by common indoor pests. Whether it’s aphids, spider mites, or mealybugs, knowing what pests are affecting your plants will help you take the right action before things spiral out of control.
In this guide, we’ll walk you through everything you need to know—how to spot pests early, how to identify them accurately, and the best solutions to get your plants back to their healthy, thriving selves. Let’s dive in and ensure your plants stay pest-free and flourishing! 
2. Common Pests That Affect Indoor Plants
Indoor plants are beautiful additions to any home, but they can also attract a variety of pests. Identifying these pests early is crucial for keeping your plants healthy. Let’s dive into some of the most common culprits you may encounter on your indoor plants. 

1. Aphids 
Aphids are tiny, soft-bodied insects that usually appear in clusters on new growth or the undersides of leaves. They can be green, black, or even yellow. Aphids suck the sap from plants, causing yellowing leaves and stunted growth. You might also notice a sticky residue on the plant or nearby surfaces (this is called honeydew).
How to Spot Them:
- Small, soft-bodied insects (usually 1-2 mm)
- Clusters on the tips of leaves and new shoots
- Yellowing or curling leaves
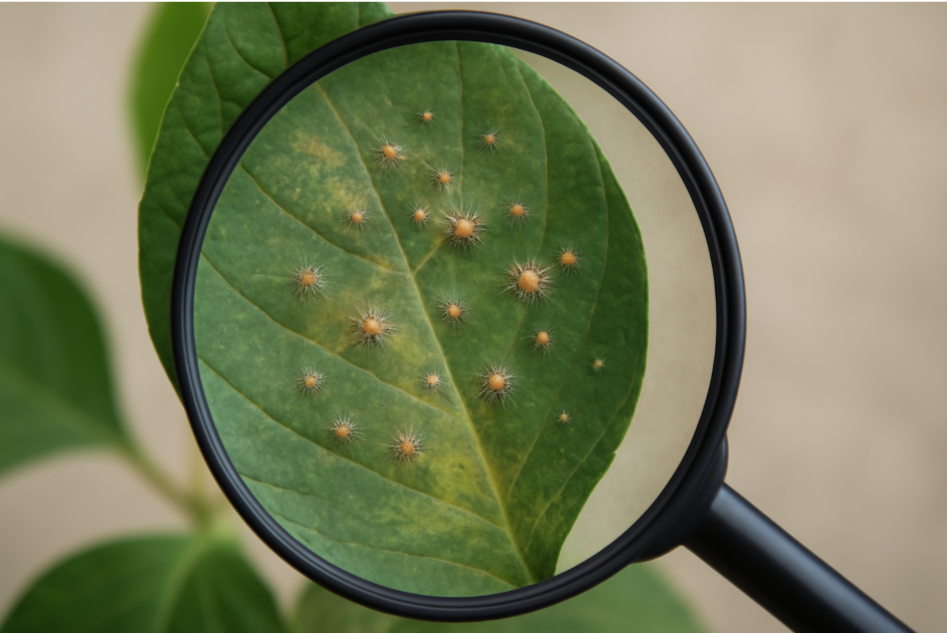
2. Spider Mites 
Spider mites are incredibly small (about the size of a pinhead), making them tricky to spot. They leave fine webbing on plants, especially on the undersides of leaves. These pests feed on plant cells, leading to discoloration, speckling, and eventual leaf drop.
How to Spot Them:
- Tiny red, brown, or yellow dots (often mistaken for dust)
- Fine webbing on stems and leaves
- Yellow or mottled spots on leaves
3. Mealybugs 
Mealybugs are small, white, cotton-like insects that tend to hide in plant crevices, such as leaf axils or the base of stems. They are sap-sucking pests that can cause wilting, yellowing, and a sticky mess from the honeydew they excrete.
How to Spot Them:
- White, cottony masses
- Hiding in plant crevices or leaf joints
- A sticky residue around the affected areas
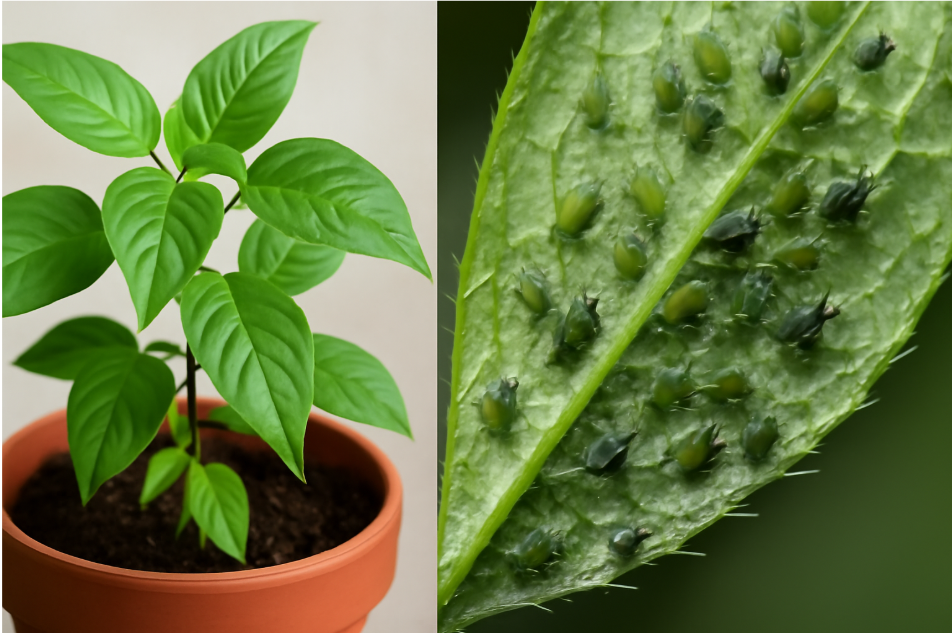
4. Scale Insects 
Scale insects are small, oval-shaped pests that attach themselves to plant leaves and stems, forming hard, waxy shells. They feed by piercing the plant’s surface and draining its sap. Over time, they cause yellowing leaves and reduced plant vigor.
How to Spot Them:
- Hard, round, or oval bumps (resembling small scales)
- Usually found on the underside of leaves or stems
- Yellowing or damaged plant tissue near the infestation
5. Whiteflies 
Whiteflies are tiny, flying insects that resemble small moths. They often hide on the undersides of leaves and are notorious for flying in clouds when disturbed. Like aphids, they feed on plant sap and excrete honeydew, which can lead to the growth of black mold.
How to Spot Them:
- Small, white, moth-like insects (about 1-2 mm)
- Cloud of insects fly out when disturbed
- Yellowing leaves and honeydew residue
6. Fungus Gnats 
Fungus gnats are small, dark flies that are attracted to moist soil. The larvae live in the soil, feeding on roots, which can cause wilting and stunted plant growth. While the adults are mostly just annoying, the larvae can severely damage the roots of your plants.
How to Spot Them:
- Small, dark flying insects near the soil
- Larvae visible in moist soil (look like tiny worms)
- Wilting or yellowing plants, especially when the infestation is severe
How to Prevent and Control These Pests
- Regularly Inspect Your Plants: Check the undersides of leaves and the soil for any signs of pests.
- Use Natural Remedies: Neem oil, insecticidal soap, or a mix of water and dish soap can help manage many of these pests organically.
- Maintain Plant Health: Healthy plants are less susceptible to pests. Ensure proper watering, drainage, and lighting conditions for your plants.
Understanding these common pests is your first step to preventing damage and ensuring your indoor plants stay vibrant and healthy. Happy gardening! 
3. How to Identify Pest Infestation
Identifying a pest infestation early is key to preventing serious damage to your indoor plants. By keeping a close eye on certain signs and symptoms, you can catch pest problems before they get out of control. Let’s walk through how to identify common pests on your plants. 
1. Look for Visible Pests
One of the first signs of a pest infestation is seeing the pests themselves. Start by inspecting the undersides of leaves and stems, where pests like to hide. You may also notice tiny flying insects or crawling bugs near the base of the plant.
Signs to watch for:
- Tiny insects or webs on your plant

- Fleeting bugs flying around when you disturb the plant
- Crawling insects on leaves or stems
2. Check for Discoloration and Damage
Pests often feed on plant sap, leading to changes in the plant’s appearance. Yellowing leaves, browned edges, or dropped leaves are signs that your plant might be stressed due to pest activity.
Signs of damage:
- Yellowing or curling leaves: Caused by aphids, mealybugs, or spider mites

- Brown spots or holes: Often seen with chewing pests like caterpillars or grasshoppers
- Wilting: Can happen if pests are feeding on the plant’s roots, like with fungus gnats
3. Sticky Residue (Honeydew)
Some pests, like aphids and whiteflies, excrete a sticky substance called honeydew. This syrupy substance can coat your leaves and surrounding surfaces, making the plant appear dirty or greasy. It’s often accompanied by black sooty mold, which thrives on honeydew.
Signs to look for:
- Sticky or shiny leaves

- Black mold growing on leaves or surrounding surfaces

4. Webbing and Fine Threads
If you see fine webbing between leaves or stems, you’re likely dealing with spider mites. These pests are so tiny they can be hard to spot, but the webs they produce are a telltale sign. Spider mites will also cause yellow spots and stippling on leaves.
Signs of webbing:
- Fine webs around the plant’s stems or leaves
- Speckled or stippled leaves from feeding
5. Tiny Eggs or Larvae
Look for eggs or larvae that may be hidden in crevices or along the base of leaves. Mealybugs often lay their eggs in cotton-like clusters, while whiteflies and aphids lay eggs on the leaf surface. Larvae, like those of fungus gnats, will appear as tiny white worms in the soil.
Signs of eggs/larvae:
- Cotton-like egg clusters under leaves (mealybugs)
- Small white larvae in the soil (fungus gnats)

6. Flying Insects
If you see tiny flying insects near your plant, chances are you’re dealing with whiteflies, fungus gnats, or other flying pests. These pests tend to fly in swarms when disturbed, especially if they’re on the underside of leaves.
Signs of flying pests:
- Tiny flying insects that scatter when you touch the plant
- Swarms of insects flying around the base of the plant
Quick Checklist for Identifying Pest Infestation:
- Visible pests: Look for bugs, eggs, or webbing
- Damage to leaves: Yellowing, curling, or holes
- Sticky residue: Honeydew with potential black mold
- Webbing: Fine threads between leaves
- Flying insects: Swarms or tiny flies
- Larvae in soil: Tiny worms or pests in the soil
4. Simple Step-by-Step Guide to Identifying Pests on Indoor Plants
Identifying pests on your indoor plants doesn’t have to be a complex task. By following this simple, step-by-step guide, you’ll be able to spot pests early and take the right action to protect your plants. Let’s get started!
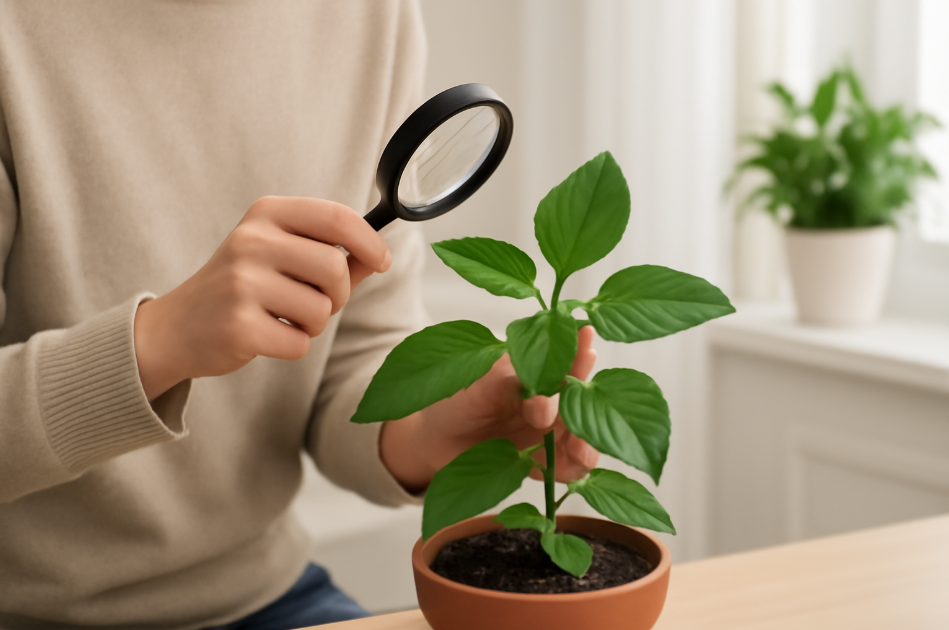
Step 1: Inspect Your Plant Thoroughly
Start by examining your plant from top to bottom, including the undersides of leaves, stems, and soil. Pests tend to hide in hard-to-reach areas, so a close inspection is essential. Use a magnifying glass if necessary to look for tiny pests like spider mites or aphids.
Step 2: Observe Symptoms of Damage
Look for common signs that pests might be affecting your plant. This includes:
- Yellowing or curling leaves: Often caused by sap-sucking pests like aphids and mealybugs.
- Speckled or damaged leaves: Spider mites cause stippling (tiny spots) on leaves.
- Sticky residue: This could be honeydew, excreted by pests like aphids or whiteflies, which leads to black mold.

Step 3: Look for Signs of Webbing or Eggs
Webbing and eggs are strong indicators of pest activity:
- Spider mites leave fine webs on the plant.
- Mealybugs leave cotton-like egg sacs in plant crevices.
- Whiteflies lay their eggs on the undersides of leaves.
Step 4: Check for Flying Insects
Some pests, like whiteflies and fungus gnats, are harder to catch but fly around when disturbed. Gently tap the plant or shake it slightly. If you see tiny flying insects, you may have a whitefly or fungus gnat infestation.
Step 5: Check the Soil
Don’t overlook the soil, as it can be a hotspot for pests like fungus gnats. These pests lay their eggs in the damp soil, and the larvae feed on the roots. If your plant is wilting or looking unhealthy, check the soil for tiny black flies or larvae.
Quick Recap:
- Inspect the entire plant: Check leaves, stems, and soil thoroughly.
- Observe symptoms: Look for yellowing, curling, or speckled leaves.
- Look for webbing or eggs: Spider mites and mealybugs leave these signs behind.
- Test for flying pests: Gently disturb the plant to spot flying insects.
- Examine the soil: Check for fungus gnats or larvae in moist soil.
5. Natural Ways to Solve Pest Problems
If you want to keep your indoor plants healthy while avoiding harsh chemicals, natural pest control methods are a great option. Not only are they effective, but they’re also safe for both you and your plants. Let’s explore some simple, eco-friendly solutions to tackle common pest problems.
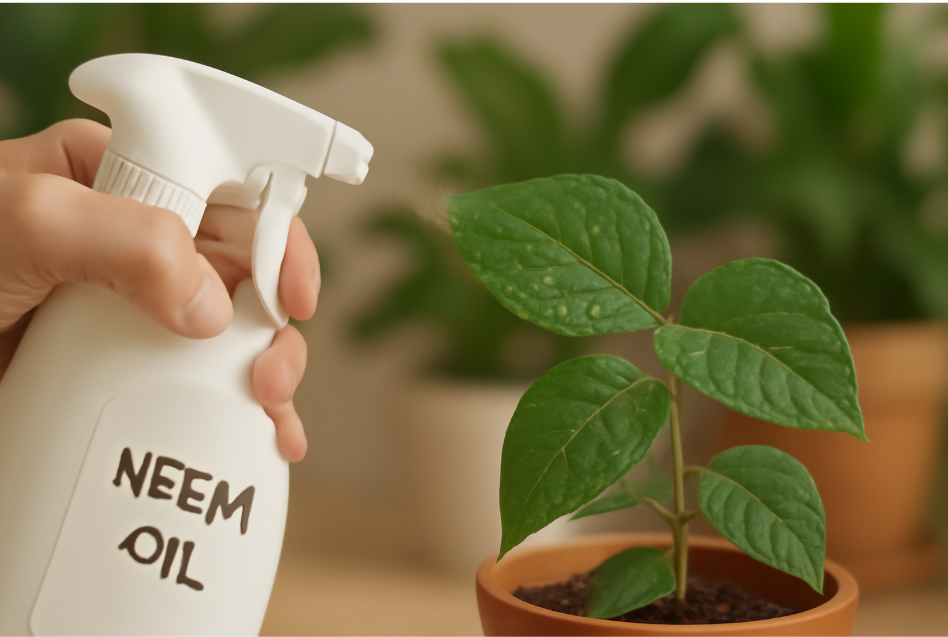
1. Neem Oil 
Neem oil is a powerful, natural pesticide that works on a variety of pests, including aphids, mealybugs, and spider mites. It disrupts the pests’ feeding and reproductive cycles without harming your plant.
How to Use It:
- Mix 2 tablespoons of neem oil with 1 liter of water.
- Spray it directly on affected areas, including the undersides of leaves and stems.
- Apply once a week until the pests are gone.
2. Insecticidal Soap 
Insecticidal soap is another excellent option for tackling soft-bodied pests like aphids, mealybugs, and whiteflies. It works by breaking down the outer layer of the pests, causing dehydration.
How to Use It:
- Purchase ready-made insecticidal soap or make your own by mixing mild liquid soap (like castile soap) with water.
- Spray the soap solution directly onto the affected areas, especially where pests are most concentrated.
3. Diatomaceous Earth (DE) 
Diatomaceous earth is a fine powder made from fossilized aquatic organisms. It’s harmless to humans and pets but deadly to insects. It works by dehydrating pests that come into contact with it, making it effective for ants, cockroaches, and crawling pests like slugs.
How to Use It:
- Lightly dust the soil surface or plant leaves with DE.
- Reapply after watering or heavy rain, as it loses effectiveness when wet.
4. Essential Oils 
Certain essential oils, like peppermint, rosemary, and tea tree oil, have insect-repelling properties. These oils are effective against a range of pests, including spider mites, ants, and whiteflies.
How to Use It:
- Mix 10-15 drops of essential oil with 1 liter of water.
- Add a few drops of mild liquid soap to help the oil mix with the water.
- Spray on your plant’s leaves, focusing on the areas where pests are present.
5. Beneficial Insects 
Introducing natural predators into your plant care routine is a great way to naturally control pests. Ladybugs, lacewing larvae, and predatory mites are all excellent choices for tackling pests like aphids and spider mites.
How to Use It:
- Purchase beneficial insects online or at garden centers.
- Release them onto the affected plants and let them do their job!
6. Garlic and Pepper Spray 
A homemade garlic and pepper spray is a great DIY solution for deterring pests. Both garlic and hot peppers are natural repellents for a variety of insects.
How to Use It:
- Blend 3-4 garlic cloves with 1 tablespoon of hot pepper flakes in a liter of water.
- Strain the mixture and spray it on your plants, especially the undersides of leaves.
- Apply once a week until the pests are gone.
Why Choose Natural Pest Control?
- Safe for your plants: Natural methods are generally less harsh and won’t damage your plants.
- Environmentally friendly: They don’t harm beneficial insects or the broader ecosystem.
- Non-toxic: You won’t be introducing harmful chemicals into your home, making it safer for pets and children.
6. Chemical Solutions for Severe Infestations
While natural remedies are great for preventing and controlling minor pest problems, sometimes a severe infestation requires stronger intervention. Chemical solutions can be effective when pests are out of control, but they must be used carefully to avoid harm to your plants or the environment. Let’s take a look at when and how to use chemical pest control effectively. 
1. When to Use Chemical Pesticides
If you’ve tried natural solutions and the pests keep coming back, or if the infestation is widespread and your plant’s health is at risk, it’s time to consider chemical options. Chemical pesticides should be a last resort and used only for severe infestations. Overusing them can harm the environment and beneficial insects, so be sure to follow the guidelines carefully.
Signs you may need chemical pesticides:
- A persistent pest problem that doesn’t improve with natural treatments.
- Significant damage to plant health, such as stunted growth, yellowing leaves, or leaf loss.
- Large-scale infestations that affect multiple plants.
2. Choosing the Right Pesticide
Not all chemical pesticides are the same, so it’s important to choose the one that targets your specific pest without harming your plant. There are two main types of chemical pesticides:
- Systemic Pesticides: These are absorbed by the plant and circulate throughout its tissues. They work by killing pests that feed on the plant. These are best for persistent pests like mealybugs and aphids.
- How to use: Apply to the soil or leaves as directed. The plant will absorb the pesticide, killing pests over time.
- Contact Pesticides: These kill pests on contact. They’re effective for immediate pest control, but may require multiple applications. They work well for pests like spider mites or whiteflies.
- How to use: Spray directly on affected areas, such as leaves, stems, and soil.
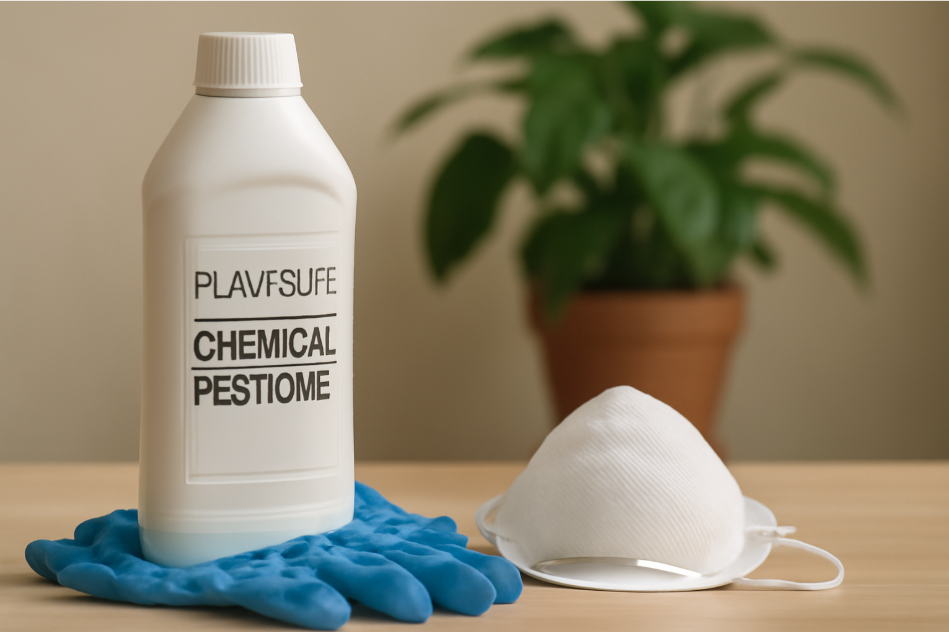
3. Applying Pesticides Safely
Proper application is key to ensuring the pesticide is effective while minimizing harm to your plants. Here’s how to apply it safely:
- Read the Label: Always read and follow the instructions on the pesticide label. This includes recommended application rates, safety precautions, and reapplication intervals.

- Wear Protective Gear: Wear gloves, a mask, and eye protection to avoid contact with the pesticide. If using a spray, apply in a well-ventilated area.
- Test on a Small Area: Before applying the pesticide to the entire plant, test it on a small, inconspicuous area to make sure it doesn’t harm the plant.
- Apply at the Right Time: Apply pesticides early in the morning or late in the evening when your plants are not in direct sunlight to prevent burning.
4. Precautions After Application
After applying pesticides, it’s important to monitor your plants for any signs of stress or damage. Chemical treatments can be harsh on sensitive plants, so make sure to follow up with good plant care:
- Water Thoroughly: After applying the pesticide, water your plants well to dilute any remaining chemicals in the soil.
- Isolate Treated Plants: If possible, keep treated plants away from other healthy plants to avoid spreading the pesticide or pests.
- Avoid Pollinators: Keep your plants away from areas where pollinators like bees and butterflies are present until the pesticide has dried.
Important Safety Notes 
- Avoid overuse: Using chemical pesticides too often can lead to pests developing resistance, making future treatments less effective.
- Choose environmentally friendly options: Look for pesticides that are labeled as safe for pets and children, and avoid harsh chemicals that may cause long-term harm.
7. Preventing Future Pest Infestations
The best way to protect your indoor plants from pests is to prevent infestations before they start. By establishing a good care routine and being proactive, you can create a healthier environment for your plants and avoid future pest problems. Here are some practical tips to help you keep your plants pest-free.
1. Regularly Inspect Your Plants
One of the easiest ways to catch pest problems early is by checking your plants regularly. Spend a few minutes each week inspecting your plants, especially the undersides of leaves and soil. Early detection can save your plants from major damage.
What to look for:
- Yellowing or curling leaves
- Webbing or sticky residue
- Tiny insects or eggs
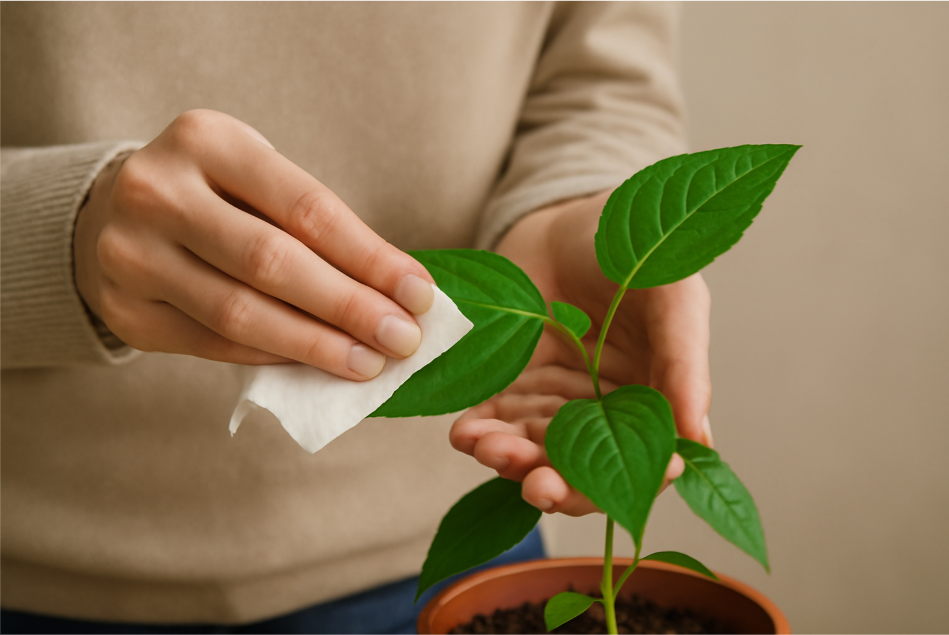
2. Keep Your Plants Clean
Dust and debris on your plants provide hiding spots for pests. Wipe down leaves with a damp cloth to remove dust and prevent pests from settling in. For larger plants, use a gentle stream of water to rinse off the leaves and remove any lingering insects.
3. Maintain Proper Plant Care 
Healthy plants are less likely to be attacked by pests. Ensure your plants are getting the right amount of light, water, and nutrients to stay strong and resilient. Overwatering or poor lighting can stress your plants, making them more susceptible to pests.
Key care tips:
- Watering: Let the top layer of soil dry out before watering again to avoid attracting pests like fungus gnats.
- Lighting: Ensure your plants are getting enough light for optimal growth, but avoid direct sunlight for sensitive plants.
- Soil drainage: Make sure your pots have drainage holes to prevent waterlogging, which can attract pests.
4. Quarantine New Plants
Before adding new plants to your collection, quarantine them for at least 2 weeks. This gives you time to check for pests and ensure they’re not carrying anything harmful into your home. If you spot pests, you can treat them without risking your other plants.
5. Use Natural Pest Barriers
Certain plants, like marigolds and lavender, act as natural repellents for common pests like aphids and whiteflies. Placing these plants near your other houseplants can help create a barrier against pest infestations.
6. Maintain a Clean Environment 
Pests love clutter, so keeping your plant area tidy can reduce the risk of an infestation. Regularly remove fallen leaves, dead flowers, and any plant matter from the surrounding area to eliminate potential breeding grounds for pests.
What to do:
- Clean the area around your plants frequently
- Remove dead or decaying plant material to prevent attracting pests
7. Regularly Rotate Plants 
Rotating your plants ensures they receive even sunlight and air circulation, which reduces the chances of pests settling in one area. This also helps with the overall health and growth of your plants.
Pest identification for indoor plants is essential for maintaining a healthy, thriving garden. By regularly inspecting your plants, recognizing the signs of pests early, and taking action with natural or chemical solutions when needed, you can keep your indoor plants pest-free and flourishing.
Remember, the key to preventing future infestations is consistent care—from maintaining proper watering and lighting to regularly cleaning your plants and isolating new ones. By staying proactive, you’ll build a strong defense against pests and ensure your plants thrive for years to come.
With the tips in this guide, you’re equipped to handle common pest problems with confidence. Happy gardening, and may your indoor garden stay healthy and beautiful! 